
Are you ready to learn a new skill at the Oh My! Handmade summer camp and grab your “Create A Repeat Pattern” badge?
Caution: Pattern making may be addictive. Side effects may include spending endless hours in front of your computer, squinting, doodling incessantly, and feeling giddy.
I honestly am not sure what spurred my interest in pattern and surface design, but once I started with that very first pattern, it’s been impossible to stop. I could spend hours and days and maybe the rest of my life designing new repeat patterns.
I’ve had a few people ask for a tutorial on creating a repeat pattern, so here we go! FYI, I am using a Mac with Photoshop CS3.
There are many methods of making repeat patterns. You can do it all by hand, use a vector program like Adobe Illustrator (my favorite way), or use a raster based program like Adobe Photoshop. Because I tend to work digitally and I think more people are likely to have Photoshop than Illustrator, I am going to show you how to create the pattern with Photoshop.
1. To start, you will want to have a design to use. For this tutorial, I am going to use a pen and ink doodle that I will scan into the computer. I start with a 600 dpi scan which I save to my computer. Make sure your image is saved as an RGB (or CMYK if need be) image. Check by going to Image>Mode.
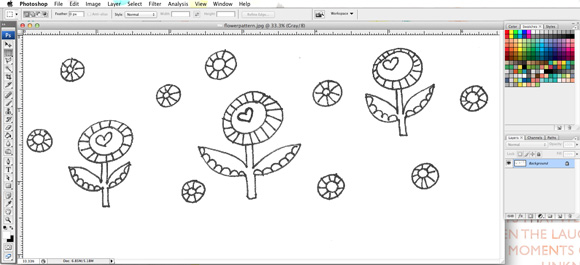
2. The next thing I always do is duplicate the background to have two identical layers (in case I fudge up). You can do this by right clicking on the background layer in your Layers Palette and choosing Duplicate Layer.
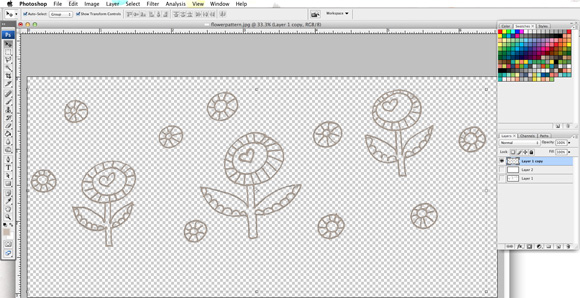
3. Next, let’s remove the white background from that new layer. Turn off the background layer. Select the new layer, then go to your Channels Palette. Hold down the Command Key (CTRL) and click on the RGB channel. This will select all of the white in the image. Hit delete to erase the white and leave a transparent background.

4. Now go to Select>Inverse to select all the black. Make a new layer while still saving your selection. Use the Paint Bucket tool (make sure contiguous is checked) to paint all of your lines a new color, whichever you prefer. I chose a tan color.
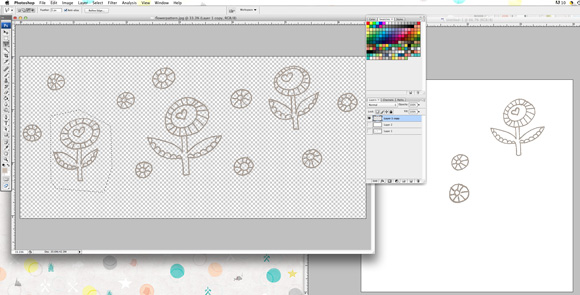
5. Create a new file where you will transfer your motifs that you just created and tweaked. I am creating a file that is 1200 px by 1200 px wide which is the resolution for a swatch on Spoonflower. Use the Marquee Tool to start moving each motif to your new file (you can drag or copy and paste).
6. Once you have all of your motifs moved over, place them in a way that’s appealing to you. After that’s done, it’s time to color! Create a layer directly above the background layer (and under your motifs) and paint it a fun color. Then make another layer above that and proceed to color in your motifs on that layer. You can either use the Paintbrush or the Paint Bucket for this. All of your original line work should stay on layers above your new colors.
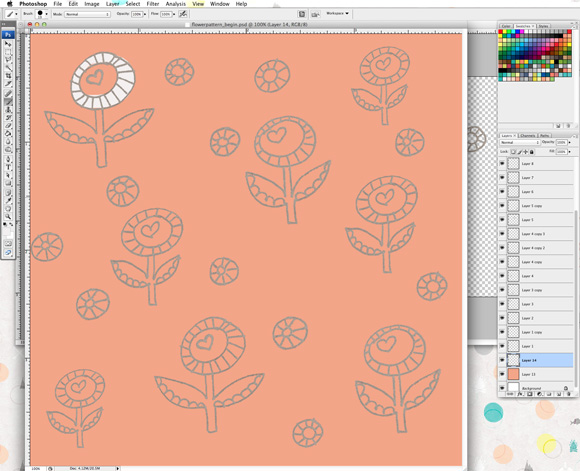
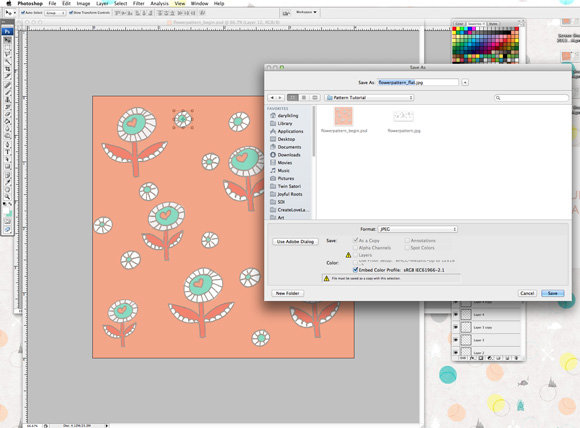
7. When you get all your colors and motifs the way you like them, you need to flatten your image. (I usually save a copy of the .psd file first in case I mess something up or want to change something later). To flatten, right click in the Layer Palette and click Flatten Image.
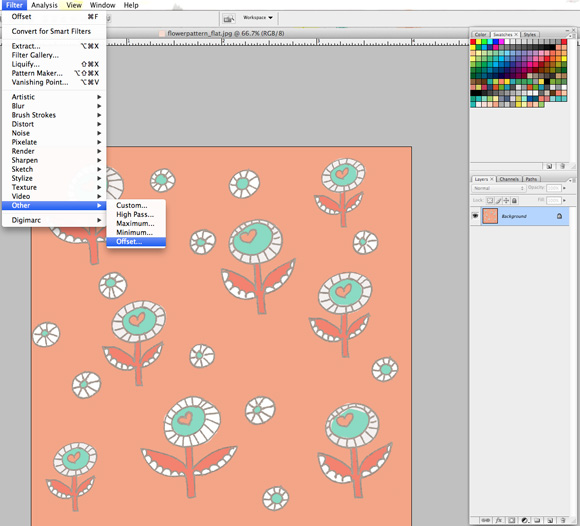
8. The next few steps are going to help you turn this design into a repeating pattern. With your flattened image, go to Filter>Other>Offset. Set the Vertical Offset to half your image size (600 px in this case) and set your Horizontal Offset to zero. Make sure Wrap Around is checked. You’ll see that the motifs that were in the middle are now split along the top and bottom edges.
9. Now you need to fill any blank areas with motifs and tweak the pattern to your liking. You can use your marquee tool to move and copy motifs. Just make sure anything that you change or add does not touch or overlap any of your canvas edges.
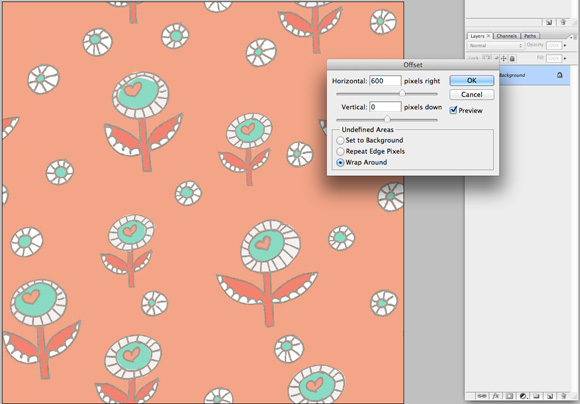
10. You will now repeat the offset process for the horizontal (make sure your image is still flattened). Go to Filter>Other>Offset again and this time put a value of zero for the Vertical Offset and half the image width (600px here) for the Horizontal Offset. Now the left and right edges are brought to the middle of your canvas.
11. Again, fill in any blank areas with motifs, staying away from the edges.
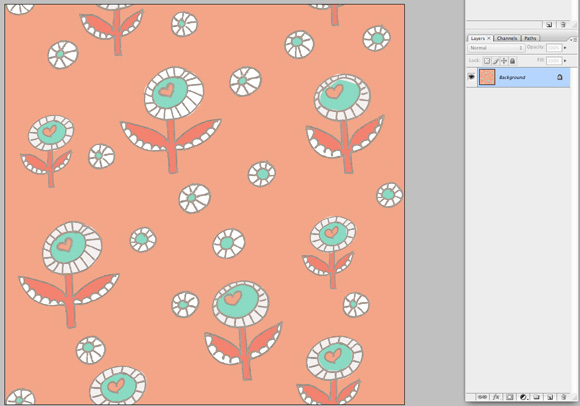
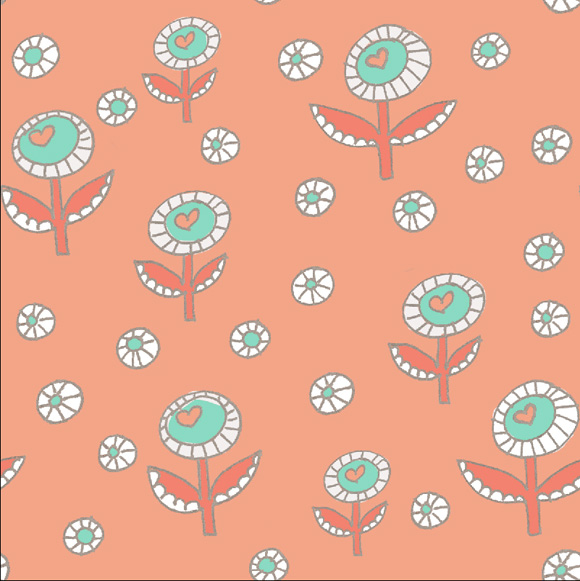
12. You may still have a gap where all of the outside corners are now meeting, so you will want to apply the offset filter one more time. Go to Filter>Other>Offset and make the Vertical Offset half your canvas size (600px) and your Horizontal Offset zero. That brings the four corners together. If you need to fill in any blank spaces, do that now. After following that process, here is what mine looks like.
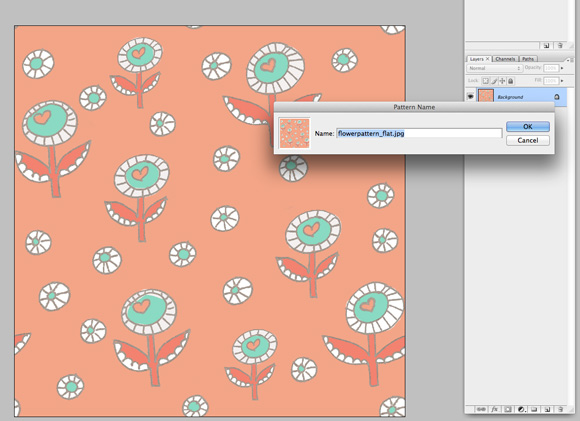
13. Now for the moment of truth! It’s time to make sure your pattern is repeating properly and flows well. Go ahead and save first. Then from the Edit menu, choose Define Pattern and name it.
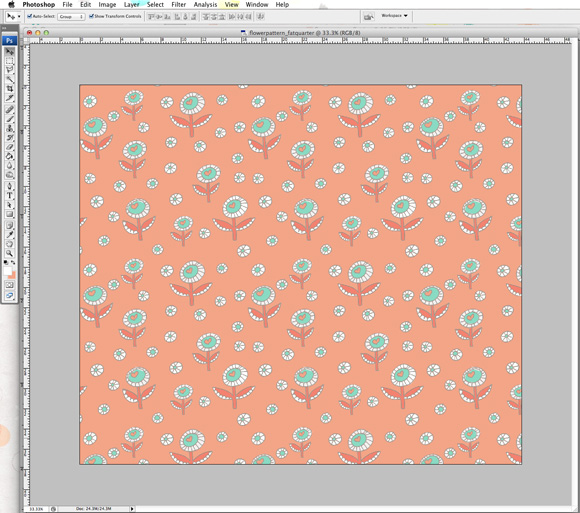
14. Create a new file to test your pattern on. You want your canvas size to be much bigger than your current file size (preferably 3x the size). I chose to make my test canvas 3150 px by 2700 px which is the size of a Fat Quarter of fabric on Spoonflower.
15. On your new canvas, Select All. Then go to Edit>Fill and choose the pattern you just saved. This will fill in your new canvas with the repeating pattern. Check it over and see if you like what you see. If so, congratulations, you have finished your beautiful repeat pattern! Time to give yourself that badge!
Up for a creative challenge? Design a repeat pattern and share it with our community to earn your pattern-making badges! Share a link to your pattern or post your pictures in the comments and let’s have some fun exploring each other’s designs.

[…] wonder how to make a repeat pattern in photoshop? I wrote a tutorial over at Oh My! Handmade that takes you though the process step by […]