by Sara Tams of sarah + abraham

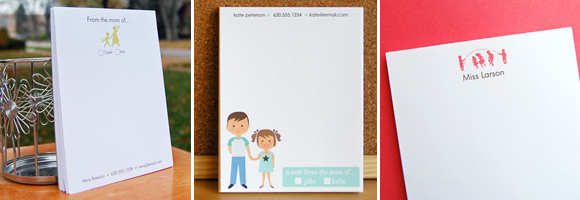
I began offering personalized notepads at the end of 2008, and they quickly became my best selling product. In fact, my teacher notepads and a note from mom notepads are currently the #1 and #2 most popular items on my website.
If you’re not already familiar with how to make your own notepads, I bet you’ll be surprised to learn how easy they are to make!

1. First I cut an 8.5″ x 11″ chipboard pad into fourths for the backs of the notepads.
2. Next I stamp the back of each chipboard sheet with my sarah + abraham stamp.
3. I print the design 4-per-page on 8.5″ x 11″ paper and cut those into fourths.

4. I stack 42 sheets of paper on top of each chipboard sheet, and then I stack all of the notepads together. I tap each side of the stack of notepads onto the table one or two times, always ending with the top end of the notepads before setting them at the edge of the table to be glued.
5. I had considered buying a padding press like this one, but I never got around to it. So here I am, hundreds of notepads later, still using heavy boxes or books to weigh the pads down (which has actually been working just fine!). Next I brush on two coats of padding compound, letting it dry completely between coats.
6. Once the final coat is dry I gently peel apart the notepads and package each set in a clear plastic sleeve.
A few additional tips:
- I sell 40-page notepads, so I always make each notepad using at least 42 sheets in case I need to remove the top one or two sheets. Sometimes excess glue will build up on the top sheet, or some of the chipboard sheet will stick to the top page of the notepad below it.
- Always double-check that you’re gluing the correct ends of the notepads. It’s so frustrating to print, cut, and glue an entire set of notepads (or multiple sets of notepads!) only to realize when the second coat of glue is dry that you’ve glued the bottom end. I’m embarrassed to admit that’s happened to me on more than one occasion!
- Be sure to line up the edge of the notepads as close to the edge of the table as possible, and also line up your weight as close to the edge of the notepads as you can. Use as little glue as possible so you have very thin coats of glue. Both of these things will help prevent the glued end of the notepads from getting “wavy”.
- I haven’t been able to find padding compound online in a smaller quantity than 1 quart (which will last for several hundred notepads), so I buy lots of small plastic bottles from a craft store to split it up into (they’re similar in size to travel shampoo bottles).

