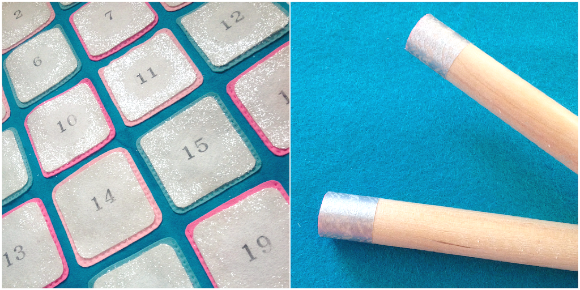
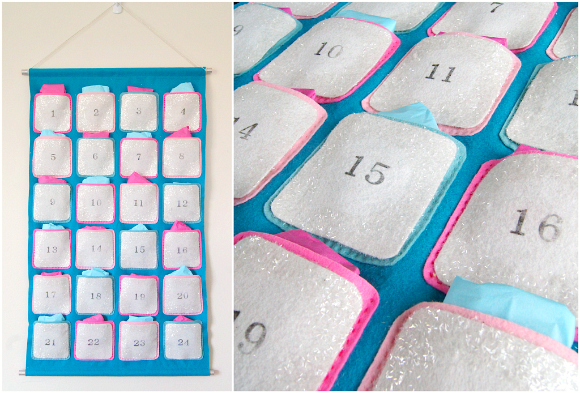
Do you celebrate Advent? It’s one of my favourite traditions of the holiday season. This year, I’ve been busy dreaming up Advent Calendars, but I saved the best for last. A gorgeous glittery forever felt calendar. When it comes to classic materials, nothing says Christmas to me quite like felt and glitter – so, I simply had to combine them into one pretty project!
I was thrilled to get to work with Benzie Bazaar felt again this year (you can see last year’s Christmas stockings here), and, while I tend to be a bit of a red & white traditionalist when it comes to Christmas colours, I knew you all were a fun bunch so I picked a vintage inspired palette from Benzie’s Glitter and Glass collection. This felt is simply oh so lovely to work with – thick merino wool blend felt in a multitude of sizes and rich colours. Nothing like that junky thin felt of our childhood craft adventures.
With sweet colours and glittered accents inspired by frosty winter windows, this is a nice large calendar which, while not tricky to construct, is pretty impressive to look at (if I do say so myself). The final dimensions are approximately 18″ x 30″ (46cm x 76cm).
Benzie’s Glitter & Glass Collection
Materials:
Wool Felt – I used 1/2 yard (18″ x 36″) Peacock for background, 1/2 yard (18″ x 36″) Parchment for number squares, 12″ x 18″ Pink, 12″ x 18″ Flamingo, 12″ x 18″ Swan.
Matching thread
Spray Glue
Glitter – I used Martha Stewart Tinsel Glitter in Crystal
Wooden Dowel – 2 pieces 1/2″ x 19″
Twine or Ribbon – I used Silver & Natural Glitter Twine
Optional – Fabric/Craft Glue, Washi Tape, Number Stamps, Embroidery Thread
Steps:
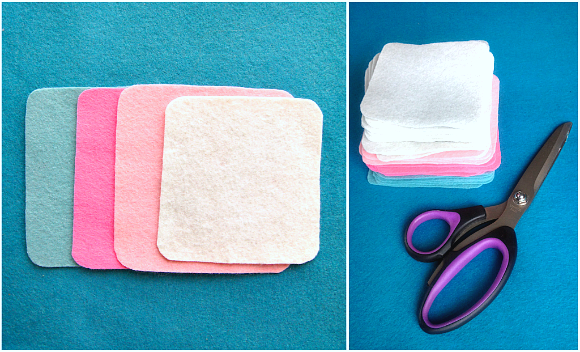
First prepare the felt squares for the pockets of your Advent Calendar. Cut 24 felt squares measuring 4″ x 4″. You may want to use a template to keep the squares standard. Or a rotary cutter and ruler. I cut 8 Pink, 8 Flamingo and 8 Swan squares.
Cut 24 felt squares measuring 3.5″ x 3.5″ for your glittered number squares. Again, you can use a template or rotary cutter for this step. The colour of felt I used was Parchment.
If desired, round the edges of your squares. I wanted a softer look vs straight edges. I also find a soft edge is more forgiving if you’re concerned about getting everything lined up perfectly.
Next, decorate the 3.5″ squares you just cut with glitter and numbers.
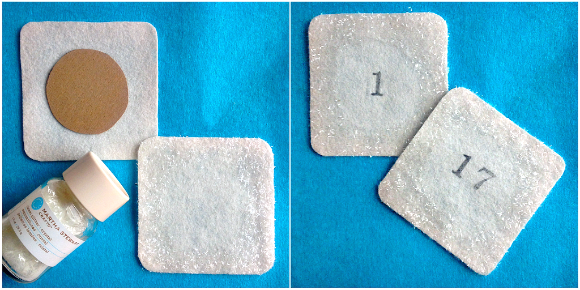
Cut a 2 inch circle out of cardstock or cardboard. Place in the centre of one of the felt number squares. In a well-ventilated area, spray your spray glue evenly over the surface of the felt square. Carefully lift the felt square onto a piece of paper or card. Evenly sprinkle with glitter and shake off excess. Remove circle. Repeat until all 24 squares are glittered. Allow to dry.
Apply the numbers 1-24 to the centres of the glittered felt squares. I used number stamps, but you could embroidery the numbers on or even cut and apply felt numbers. Whichever you fancy.
Now that the pockets and decorative numbered squares are ready, it’s time to prepare to assemble. Grab your measuring tape/yard stick and ensure the background felt piece is straight and even. You may need to trim the edges. Be careful not to cut too much – you need the full 18″ width.
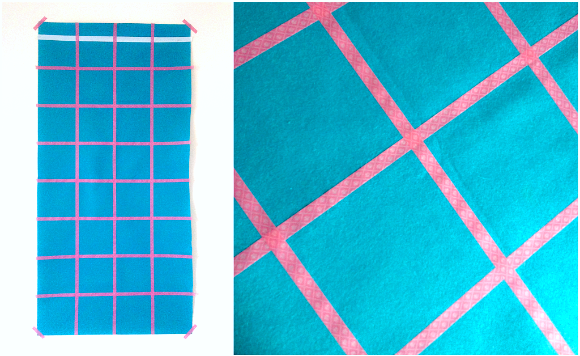
Plan the layout of your advent calendar. Tip – try marking the placement of squares with slim washi tape or masking tape by making a tape grid. This way you don’t need to pin all the squares on at once or worry about them shifting. Make sure to position your squares in the centre of the piece of felt lengthwise. You will need to leave extra space at the top and bottom to insert the dowel.
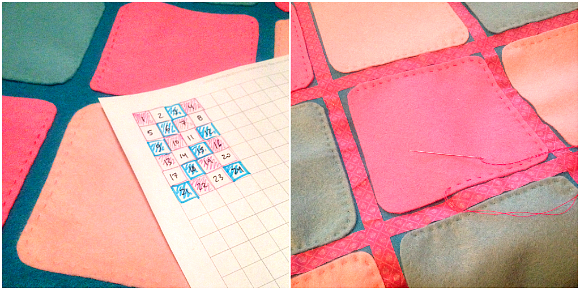
Here’s where you need to make a decision – a bit of a Choose Your Own Crafty Adventure – you can sew your glittered number squares right onto the colourful felt squares OR stick them on with fabric glue at the end. If you’d like to sew them on, that is your next step – do it now! If you’d prefer to glue your glittered squares on, continue as below:
Sew your 4″ x 4″ pocket squares onto the background. You can do this by machine or by hand – whichever you prefer.
Once all the squares are attached, it’s time to create a channel at the top and bottom for your wooden dowel pieces. Fold the bottom edge over at the desired point and pin. You want to create a 1″ wide channel (hem) at to insert the dowel into. Please adjust the size of this channel to match the size of your dowel piece. Sew. Trim off excess felt. Repeat with the top edge – you may want to leave a little more space at the top than at the bottom. No real reason, I just think it looks nicer that way!
Use fabric/craft glue to stick your glittered number squares onto the coloured felt squares. Allow to dry.
Insert dowel pieces into channels. For a pretty finishing touch, you can decorate the visible ends of your dowel with some washi tape.
Tie a piece of twine or ribbon to the two sides of the upper wooden dowel. Then, fill the calendar with sweet treats and trinkets, hang and enjoy the holiday spirit all December long!
Thanks so much to Benzie Bazaar for providing the beautiful felt for this project. We encourage you to take this inspiration and run with it – switch up colours, add a little embroidery, change the pocket sizes. Not enough time to make this by December 1st? Why not make one for a family on your Christmas gift list? They’ll enjoy Advent next year and for years to come! That’s a pretty special gift!


