It has been a wonderful month of celebration at OMHG! We have shared and celebrated new announcements, products, ideas, and dreams … all for the love of handmade. One of my favorite things about the OMHG community is that together we share and celebrate amongst each other so that we can bring the handmade way of life into our homes…to share with family and friends. What better way than to continue the the one-year celebration of OMHG by having a little party and making your own piñata to enjoy with others!
A favorite birthday tradition of many is the piñata. Piñatas have long been the centerpiece of birthday celebrations.
It is believed that piñatas originated in China and were used to celebrate the coming of spring. As a result of Marco Polo’s adventures into China, the custom was introduced to Europe and was adopted by the Spanish as well as by the French and the Italians. The Spanish later brought this custom to the new world after colonizing Mexico. Roughly around the 16th century, the Spanish missionaries introduced the piñata to the Aztec Indians. Eventually, the piñata lost its religious connection and currently is regarded as a symbol of festivity and celebration.
Things you will need to make a piñata:
• Balloon
• String
• Two bowls or similar containers to hold your papier-mâché paste and steady the balloon
• Newspaper
• Flour
• Water
• Spoon (to mix your papier-mâché paste)
• Paint
• Glue
• Crepe paper streamers or tissue paper
• Towels
• The goodies for inside your piñata
Instructions:
The first thing you will need to do is blow up a balloon and try to make it as round as possible, as well as large enough so that, when you’re done, you can place goodies inside for all to enjoy.
There are two different types of “sticky paste” that you can make to hold your piñata together. (1) is mixing a half a bottle of glue with three cups of water; or (2) making papier-mâché paste by mixing 2 cups of flour with 3 cups of water (this is what we used). The papier-mâché paste mixture can be kept in a container and used over several days later as you create your piñata. We also allowed the piñata to dry overnight before adding each successive layer.
Gather a handful of newspaper sheets and tear them into approximately 1-inch-wide strips and set aside. Grab your balloon and place it on top of the container so that it helps hold your balloon up and you can continue to place the newspaper and papier-mâché paste mixture all around the balloon.
Next you will want to dip the newspaper strips into the papier-mâché paste. Be sure to remove the excess papier-mâché paste off of the strips of newspaper so that the paste is not dripping all over as you place the strips on the balloon. You will want to add at least two or three successive layers of papier-mâché, waiting between applications for the individual layers to dry. Be sure to leave the tied end of the balloon uncovered. This will be the area where you will add the goodies into the piñata, later on we will cover this area up.
When the newspaper has dried, you will want to remove the balloon from the piñata, which is best accomplished by popping the balloon with a pin and then removing it.
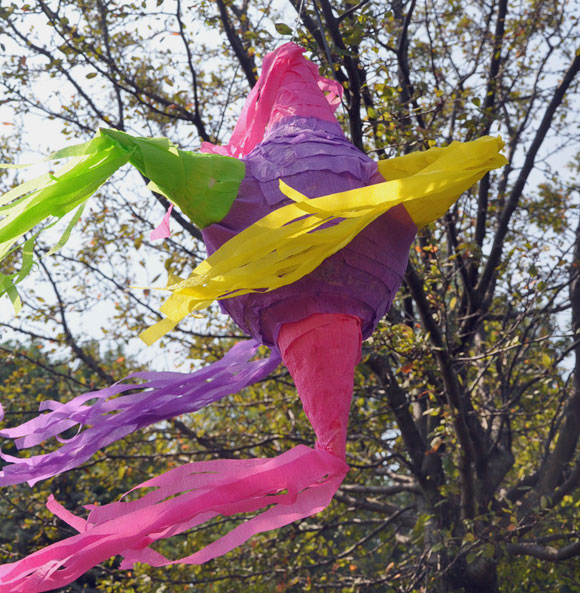
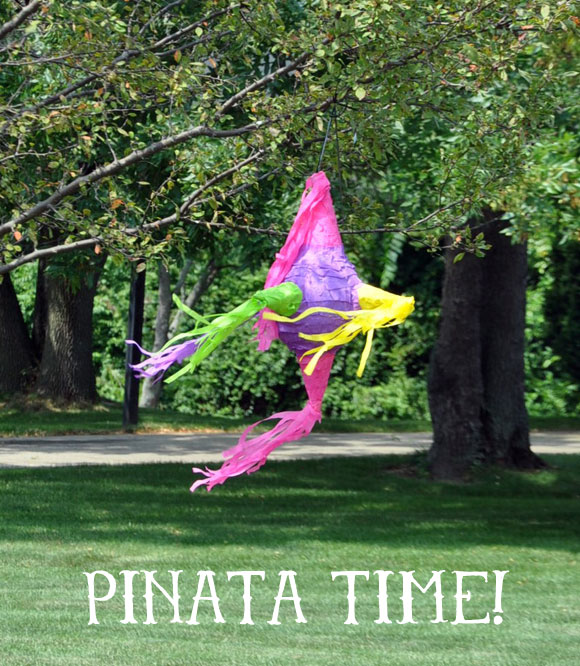
Once the piñata has dried, you may want to paint it with a solid base color. The idea is that not only does it give a vibrant background for the next step, but it adds a layer of strength. We painted our piñata purple (the area where it is round).
At this point you need to decide what shape you want your piñata to take, whether star shaped, an animal, round, etc. For this tutorial purpose we made it into a star shape. We created paper cones in the shape of a birthday party hat. At the bottom of the cone we cut several slits around the base and then folded them up so that glue could be placed on the bottom of the hat to affix to the body of the piñata. You can stick some strips of crepe paper/tissue paper or curling ribbon on the tips of the cones.
Tip! If you are using crepe paper, cut the strip of crepe paper vertically into smaller strips so that it has more fringe.
Next take your crepe paper streamers and glue them around the piñata. We placed glue on the top (underside) of the streamers so that they would adhere to the papier-mâché and not have the glue show through as much. If you want to use different colors, to stop your first color selected, just cut it and paste down and start a new color and follow the same directions as above to affix the streamers.
Before filling the piñata, be sure to make a small hole on each side of the top. On ours, we used a hole-punch and made sure it was far enough down so that it would not rip. You just want to make sure that you do not crush the papier-mâché. Next you will thread a long piece of sturdy string through the holes to hang the piñata. Then fill the piñata and attach the last paper cone on top of the piñata and get ready for fun!
What to use to fill a piñata?
There really are so many different surprises that you can include in your piñata, although most seem to include candies or a candy and toy mix. For example, various candies (would recommend individually wrapped candies), kaleidoscopes, kazoos/noise makers, games, spinning tops, jewelry, puzzles, rings, fun erasers, bouncy balls, matchbox cars, little container of bubbles, magnets, playing cards, barrettes, stickers, pencils, crayons, magnets, trading cards, whistles, and lastly confetti. Make sure that you add confetti to the piñata because it helps to disperse the weight of the piñata when it is hung.

