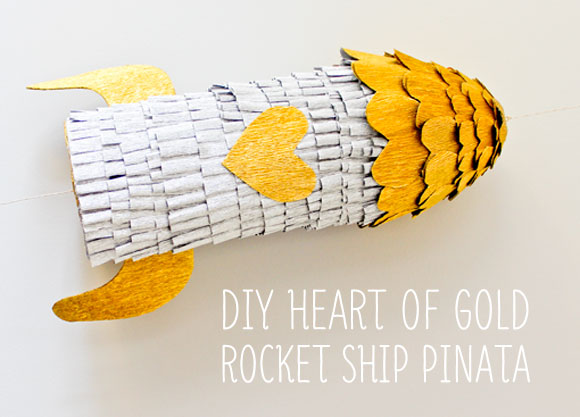
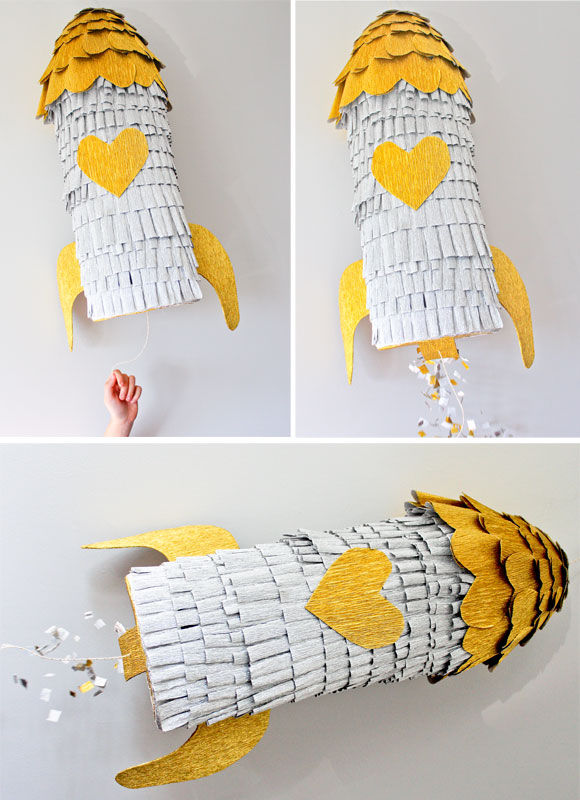
What, did you think I could end our month of businessy goodness without a serious bang? No way! The launch of our Guide to Businessy Goodness deserves no less then an explosion of awesome. This tutorial goes out to everyone who has ever sat around thinking, “You know I could really use a 3 foot rocket ship pinata right about now…” and then Googled it without satisfaction, (nearly everyone I’m sure).
What you need:
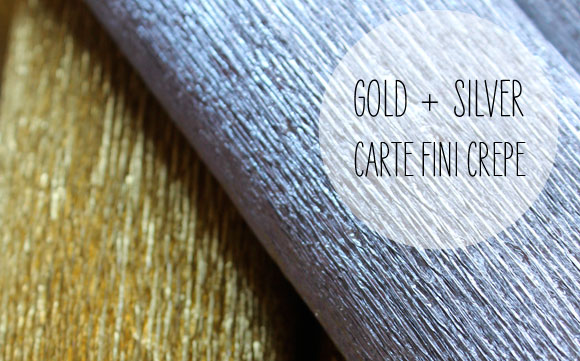
- 1 roll each of Carte Fini 180 gram Metallic Gold & Metallic Silver Italian crepe paper
- Top of a large hollow plastic easter egg (I found mine on clearance at Michael’s post-Easter)
- Large piece of matt board or cardboard
- Heavy duty tape (duct would be more space-like but we’re renovating & I have a ton of this)
- Cutting blade & scissors
- Glue gun/glue sticks
- White Glue
- Twine/monofilament
- Patience
I would never have had this idea if I didn’t reach out to Carte Fini papers about offering you a couple of tutorials featuring their paper. I’ve used high end crepe paper from a couple of online shops but this is a class of its own. The metallic paper used to make this tutorial is more like a heavy aluminum foil, with the give and resilience of crepe paper, but the feel of heavy fabric. It was so utterly perfect for crafting a ship worthy of our businessy explorations. We started our month off with a beautiful flower tutorial from Omiyage featuring their paper too, be sure to check it out!
Let’s get started!
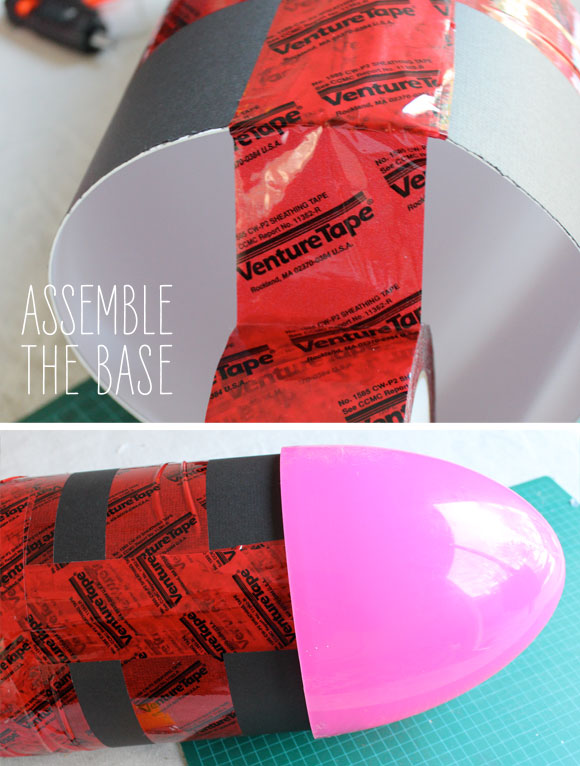
- Measure the circumference of your plastic egg with a sewing measuring tape. Cut a 3 foot long by x(the circumference of your egg + 2 inches) wide piece of cardboard. Curl the cardboard into a tube, make sure it will fit just inside your egg & tape it like crazy-up & down the seam + bands around the length of the tube.
- Attach the top of the plastic egg to the tube with tape (repeat the taping like crazy).
- Trace the bottom of the tube onto another piece of cardboard & cut out the circle to use as the bottom, set aside.
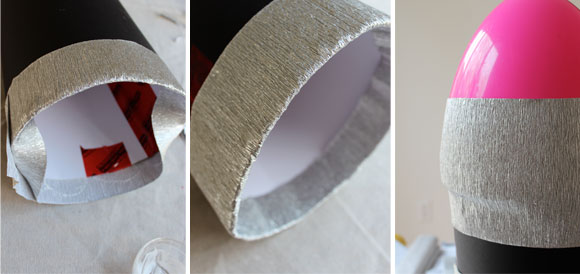
- Cut two 4 inch pieces of silver crepe paper, coat well with craft glue diluted with a little bit of water and smooth one over the top of the rocket where the egg is taped to the base.
- Glue the other around the base of the rocket, letting half of the crepe paper stick out beyond the cardboard. Carefully fold & smooth the paper around the inside of the bottom opening.
- Let dry while you cut your fringe.
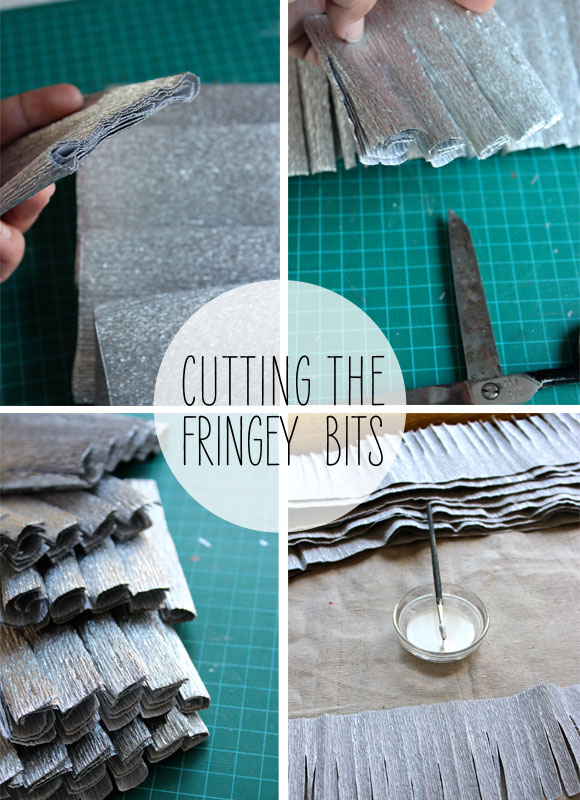
- Unroll some of your silver crepe paper, fold it over on itself about 4 inches from the end and then fold over 2x. Cut off the folded piece & repeat until you have 4 or 5 lengths of folded crepe.
- Cut all the folded pieces into equal lengths (about 4 inches)
- To cut the fringe just cut 3/4 of the way into your folded squares ever 1/4 inch
- Carefully unwrap all the fringe and lay flat
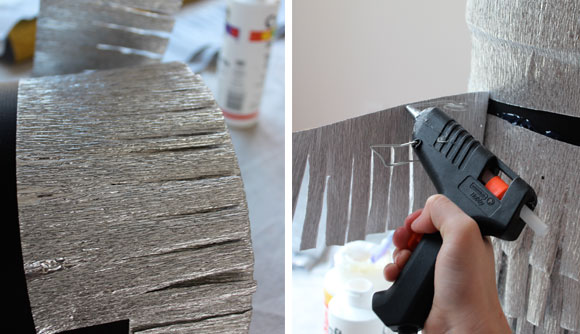
- Using your glue gun, with the rocket base upright, attach the fringe, starting at the bottom. Glue down 5-6 inches of at a time, gently stretching the paper around to meet or overlap the other end.
- Stagger your overlaps as you go up the rocket attaching the fringe.
- I used slightly longer fringe along the bottom of the rocket & made it a wee bit shorter as I went up.
- Glue the last piece right under the egg.
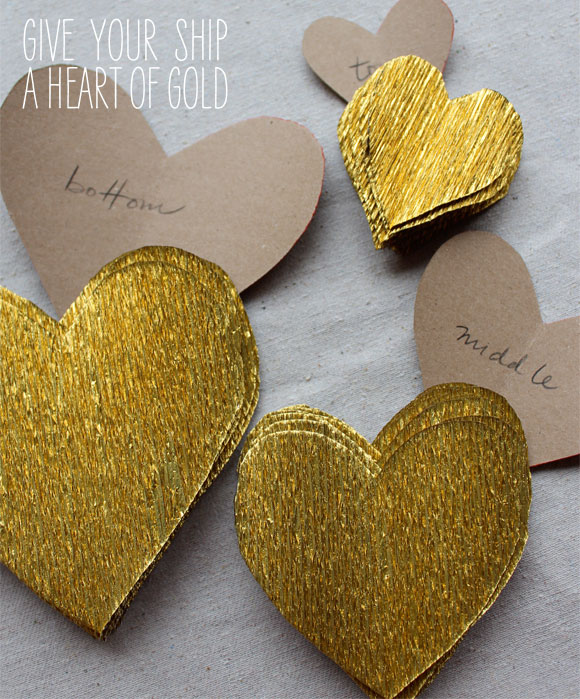
- Make a template & cut out your hearts, you want about 25 large hearts, 40 medium sized ones and 30 small ones depending on the size of your rocket’s nose.
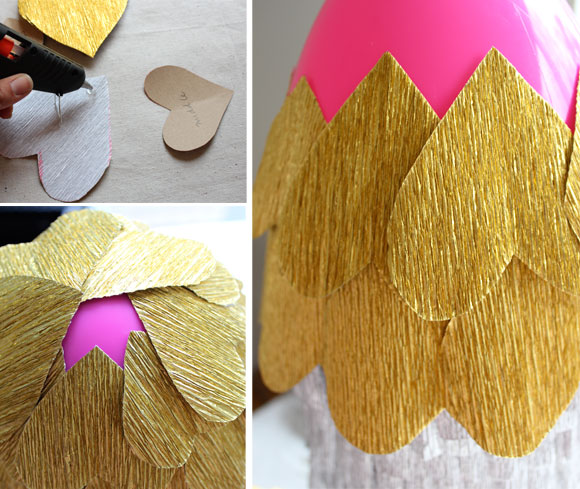
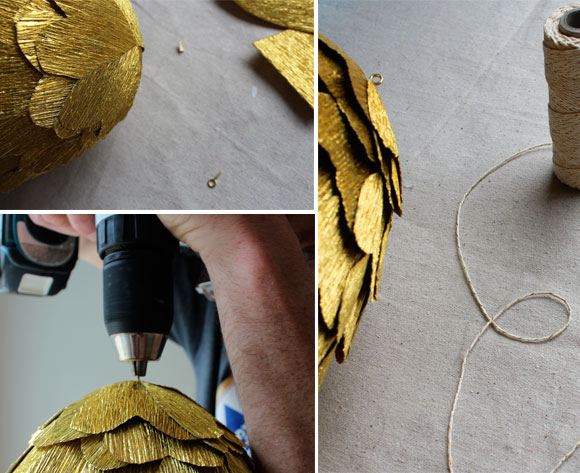
- Glue the hearts on by adding a drop of hot glue to the tip of each heart and overlapping them around the nose. I did two rows of large hearts, three of medium, and four small. Bring the points of the hearts together at the very top.
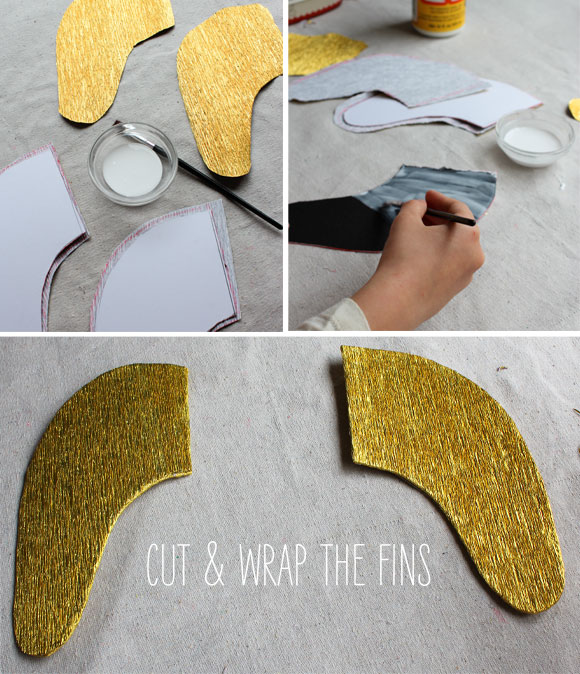
- Make the base & fins-using the template trace and cut out two cardboard fins, make smaller (or larger) as needed.
- Lay your fins onto the gold crepe paper and trace around them leave one inch of clearance around the fin.
- Flip fins over and trace around them exactly.
- Cover each cardboard fin with glue and smooth on the larger crepe cut out. Add more glue around the overhanging bits and curl around to make the edges all pretty. Glue the smaller piece on the opposite site. Let dry for a bit then put a heavy book on top to prevent curling. Do the same for the cardboard circle for the base you cut out in step one.
- Once dry attach fins to either side with hot glue.
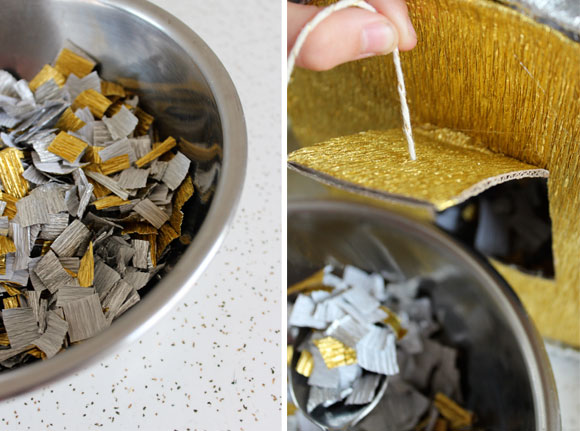
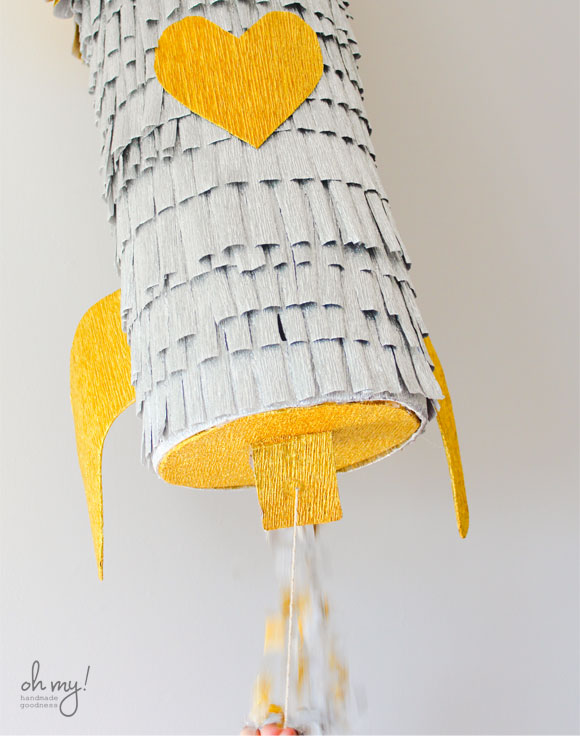
- Cut a door on the gold side of the cardboard circle with a sharp blade. Thread one foot of twine (I used this gold twine from Knot & Bow) onto a darning needle and poke through the centre of your door. Thread the twine through & knot the end a few times.
- Using hot glue, attach the gold circle to the base.
- Fit a drill with a small eye hook, drill into the top of the pinata, attach 1 foot of twine/monofilament
- Get small children to cut a bowl full of confetti (they really like this part)
- FILL IT UP!
- Hang, pull, explode in a shower of sparks & giggles.
- Repeat!
Need something to celebrate? Join over 200 creative explorers adventuring into the galaxies of businessy goodness. Check out our Guide to Businessy Goodness, name your price from $2-20+, get your copy & fire at will!
PS: Be sure to let me know if you try your hand at making your very own rocket ship! I can think of lots of parties this would be great for (like my mom’s 50th gold & tiger themed party!). Thank you Oh Happy Day for all the crepe paper inspiration.

