DIY: Crepe Paper Flowers

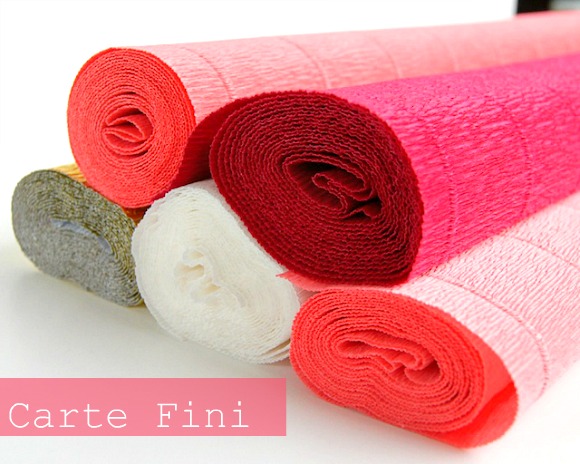
Crepe paper has always been one of those materials I’ve coveted from afar. It’s not really something you come across in a standard Canadian craft shop, so I had never had a chance to try making with it. Needless to say, when the opportunity arose to make something out of Carte Fini Italian crepe paper came up, I was super excited about it!


Of course, crepe paper in hand, I knew that, while I could dream up something else, all I really wanted to make was flowers! And this gorgeous weighty paper is simply perfect for it. But, having seen multiple tutorials online for crepe paper flowers, I wanted to give you something a little different – so I crafted up a flat version. Less realistic than the typical ones made with floral wire and tape, but oh so pretty nonetheless.

But before we dive in, a note on the paper, because it really does deserve it. The Carte Fini rolls are huge (50 x 250cm), even after days of making flowers I feel like I haven’t even put a dent in them. And the paper is luscious – it has a really lovely weight to it and heaps of stretch which makes shaping quite easy. I’m definitely trying to come up with an excuse occasion which merits adding more colours to my new crepe paper stash!

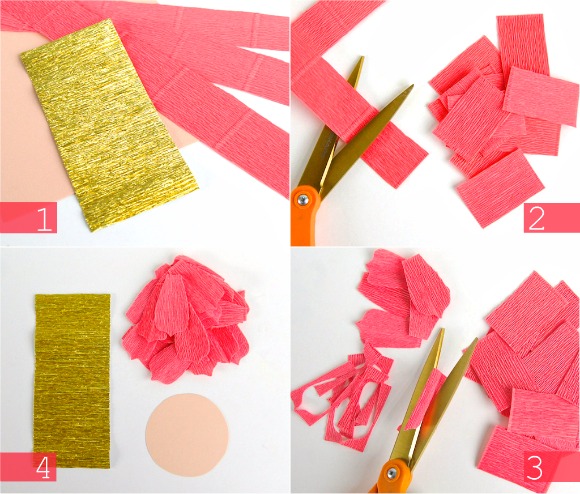
Ready? Let’s make flowers!

For each flower, you will need:

  • 2 Colours of Crepe Paper
  • Card Stock in a similar colour
  • Glue
  • Scissors
1. Gather your supplies. Cut 3 strips of crepe paper approximately 1 – 1 1/2″ (25 – 35mm) wide from the desired petal colour for your flower. Cut one piece of crepe paper approximately 3″ (75mm) x 5″ (125mm) out of the desired stamen colour for your flower.
2. Using the ridges in the Carte Fini crepe paper as a guide, cut the strips into smaller pieces. Discard any odd-sized end pieces. You should have approximately 27 rectangles of crepe paper.
3. Fold each small rectangle of crepe paper in half lengthwise (so that the crepe runs up and  down) and cut your petal shape.
4. Cut an approximately 3″ (75mm) circle from the card stock. You are now ready to start assembling your flower.
5. Using your fingers, shape each petal by pulling gently outwards. The crepe paper has a lot of stretch in it, but if you pull too far you will lose all shape. For pointy petals, try pinching the tips to accent the point. For inner petals, try curling the petal inwards by rolling it around your finger as you stretch. Glue the first petal to the outside edge of the card stock circle.
6. Glue each petal so that it slightly overlaps the one before. A note on glue – I found that a craft glue stick was better suited to this project than a liquid glue. Liquid glue will saturate the card stock and the paper will buckle while drying.
7. As you glue the petals around the outside of the card stock circle, you want to make a subtle spiral rather than a circle. When you get to the end of the first layer of petals, the final petal should be closer to the centre of the circle than the first one.
8. Continue shaping and gluing petals around the card stock circle in a spiral to create a second layer.
9. After 2 layers of petals, you may want to cut a small section off the bottom of the remaining petals (about 1/8″ or 5mm) before shaping and sticking them. This will give a shorter and more defined centre to your flower.
10. Once all petals are attached (and you might not have room for all of them), it’s time to shape the centre or stamen of the flower. Fold your piece of crepe paper in half lengthwise and then pull firmly to stretch. Snip along the folded edge, creating a fringe.
11. Roll the fringe tightly. When the stamen is as large as you’d like it, cut off the extra piece of crepe paper. Add a dab of glue to the end of the roll to secure.
12. Use hot glue (or another strong glue) to attach the stamen to the centre of your flower. Once dry, gently push the stamen open as little or as much as you want.
That’s it!
By varying the shape of the petals and the size of the stamen, you can create a variety of different flowers. I find that cutting petals with points or scallops tend to result in more interesting finished flowers than simple round petals.

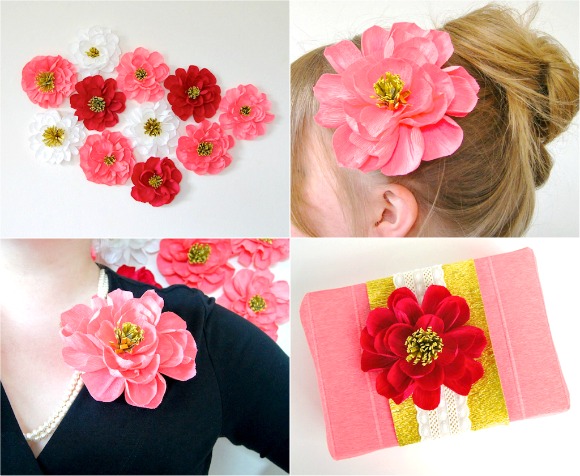
So, you’ve made a bevy of beautiful flowers – now what?! What I love about a flat flower like these is that they can be used in so many ways. Try making a floral wall installation for a party, photo backdrop or just for fun. Glue hair clips or pins to the back and place them on the table at your next event –  your guests can get in the festive mood by wearing a flower in their hair or pinned to their dress. Or why not use a paper flower instead of a bow on a beautifully wrapped gift. So lovely!

Have you worked with crepe paper before? What do you like to make with it?

What would you use these crepe paper flowers for?

28 comments

  1. Donaville says:

    Marisa, this is golden! I love that you presented how versatile the flowers can be, too! I could easily see them at a wedding, a quinceanera, or a nice night out on the town.

  2. Ruthee says:

    Hi Marisa!
    Where do you find this particular type of crepe paper? Sounds like it would be more sturdy than the stuff found at Michaels. Love the flowers and already dreaming up colours for hair clips and to pin on jackets!

  3. Kim says:

    Marisa – I really love the one that you turned into a hair accessory! I think that these flowers would be perfect for me to use on a vinyl wall decal that I have in my stationery store of a little girl with a flower on her dress. I could add a crepe flower to give the dress more dimension! Thanks for the amazing crepe flower tutorial – now I’m going to dash off to grab some supplies.

  4. Marisa says:

    Thanks everyone for your lovely comments! As I was making the flowers, I was imagining them placed at each place setting for a Mother’s Day tea or bridal shower or other lady-ish event. They’d be so pretty on the plates and then on the guests!

    Hope you have fun trying it out.

    And, yes, the paper really is just so gorgeous!

  5. Amrita Pereira says:

    Beautiful crepe paper Flowers. Its given through pic its more easy to understand it will help my dotr for her crafts. Thank u. Please let me know how to make christmas flower that red one.

  6. Allison Tolbert says:

    Can you tell me what color paper you used for this tutorial? Is the exact color i need, but its hard to tell on their website. Thanks!

Comments are closed.