Last week, I introduced you to Tara Bliven of Ephemera Press and her Elevated Envelope Exchange. This week, I thought I’d introduce you to my elevated envelopes!
The Elevated Envelope Exchange connects you with other creative souls – you create and send beautiful mail out into the world, and in return, your mailbox fills with awesome envelopes! What I love about this project, other than connecting with others, is that it’s an opportunity to try something new and to challenge yourself. As Tara says “You’ve gotta BRING IT! Anyone creative can join, and all confidence levels are welcome… But, you do have to be willing to put in some serious creative effort and work hard on it.”
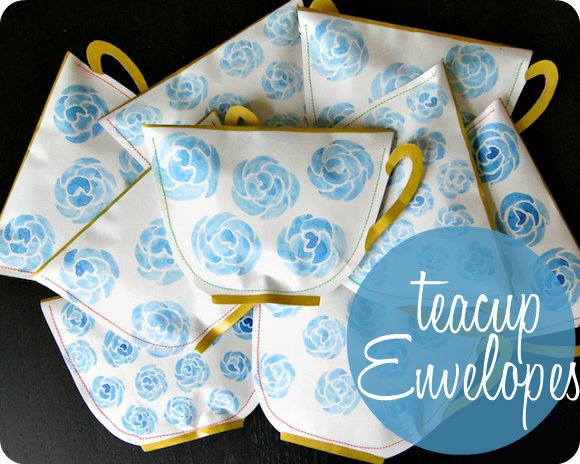
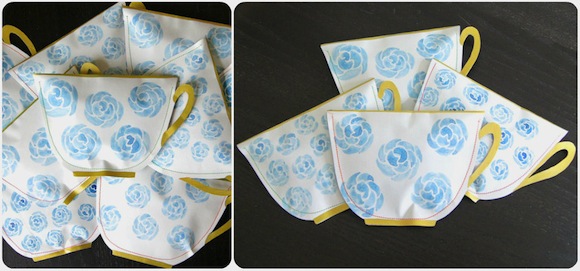
So, I challenged myself, and these teacup-shaped envelopes were the result. And I love them so much, I thought I’d share how I made them with you! I think that they’d make pretty cute invites to a tea party, if you’re the type to engage in parties of that sort (I sure am!) And, if you’re not into tea, take it as a little inspiration that with a little creativity and some quality time with your sewing machine, you can make an envelope in any shape you please!
How To Make Teacup Envelopes
Materials:
- paper for envelopes (card stock / scrapbook paper – I used the backside of an old calendar)
- template <–click here to download teacup template
- markers / paint / your desired decorating medium
- twine or string
- brightly coloured 3″x3″ origami paper
- washi tape
- small glassine bags (I used these ones from The Wrappery)
- scissors
- sewing machine
- small ( 1/16″) hole punch
- bone folder
- craft knife
Let’s start by making the teabag-shaped notes to go inside the envelopes!
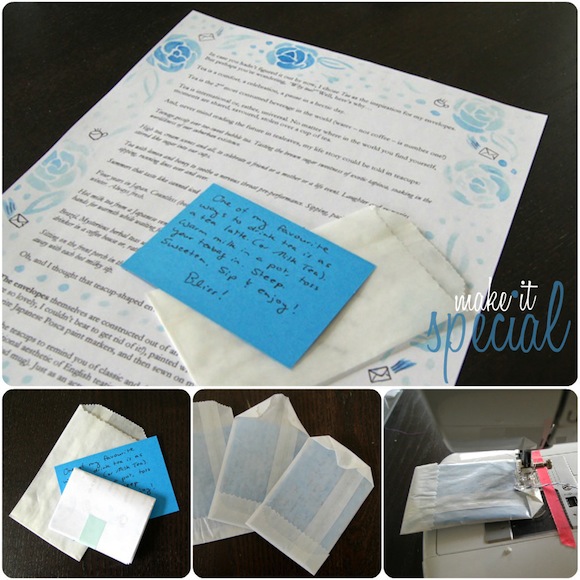
Fold your note into a size small enough to slip inside the glassine bag. Place the glassine bag (with note inside) so that the back is facing you. Fold down the corners of the open end, forming a point. Fold down the point (see middle image above for clarification.)
Cut a piece of twine about 6″ long. Take your piece of twine and glassine bag and head to the sewing machine. Tuck one end of the twine under the folded point of the glassine bag, then bring the twine up and over so that it extends over the flap and straight out. Using your machine, sew over the folded end and twine. (I went back and forth a couple times to make sure it was secure.)
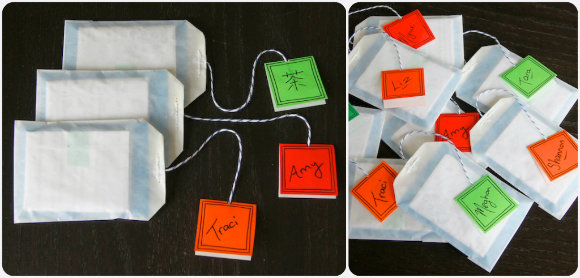
To make the tag for the teabag, start with a piece of 3″x3″ origami paper in your desired colour. Cut in half – it will now be 1.5″x3″; then fold in half. Use a fine marker / pen to write the recipient’s name and/or any other message you desire on the tag. I drew a double border on both sides, wrote the recipient’s name on one side and the symbol for tea on the other.
Use your small hole punch to punch a hole in the centre of the fold (if you don’t have one, you can simply cut a slit large enough for the twine to fit through). Feed the end of the twine through the hole in the tag. Use a small piece of washi tape to tape into place on the inside of the tag. At this point you may need to trim the twine to your desired length.
Onto the Teacups!
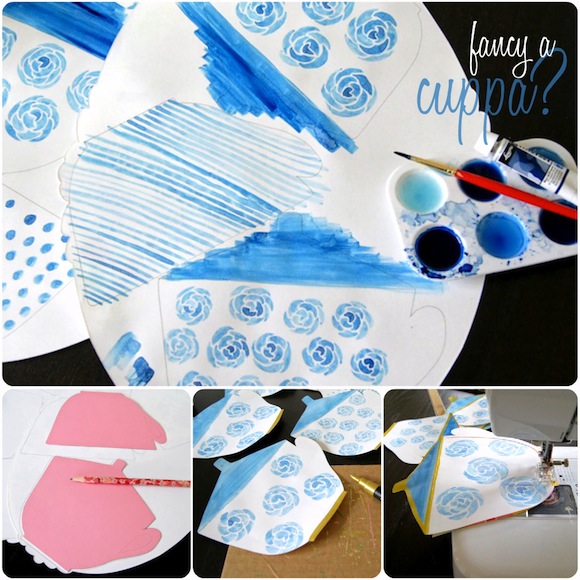
Trace the teacup template onto your desired paper. For each envelope, you will need one front piece (with lid) and one back piece (no lid). You can cut out the teacups before or after decorating, whichever works better for you. In terms of paper, you can use plain paper, as I did, if you want to spend some quality time decorating. Or why not try cutting them out of some pretty scrapbook paper?
Decorate as desired. I used blue watercolour paint on my envelopes. A solid blue wash for the lids, roses on the fronts, and stripes or dots on the backs. After painting and cutting out the teacup shapes, I accented the lid, rim, bottom and handle with a paint marker in metallic gold.
Once your teacup is looking all pretty (and dry), head back to the sewing machine. Place your two teacup shapes back to back and sew around the edge – I think it looks great with a bold thread colour, but use whatever you have / whatever you are comfortable with.
Use your bone folder and a ruler to score and then fold the envelope flap over. You will need to mark and then cut a slit in the back of the envelope for the tab on the flap to slide into. Use your craft knife to do this, but first ensure you slip a piece of cardboard inside the envelope so that you have a surface to cut into!

Slip your teabag note inside the envelope, close the flap and seal with a small piece of washi tape. Make sure the string of the teabag hangs over the edge so that the name tag is visible. If you want to mail your teacups, make sure you slip them inside an outer envelope – I used A7 vellum envelopes.
Hope you find an occasion to craft up some teacup envelopes of your own!
Are you inspired by The Elevated Envelope Exchange? Do you ever send or receive mail art?
Huge thanks to Jessika for putting together the Teacup Envelope Template for us! Now go make some pretty mail already!