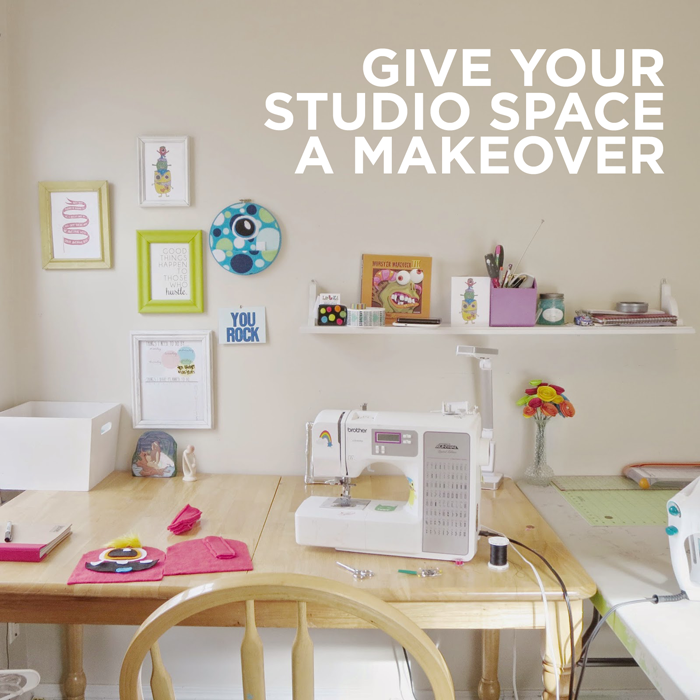
Clutter and chaos stifle creativity, but I think we as creatives tend to be pretty messy folk sometimes, huh? At least I am but clutter disrupts my inner peace, it silences my muse and depletes my motivation. Of course, we always try to tidy up, to put things in their proper place, but when you find yourself in a flurry of fantastic inspiration returning your scissors to their special space just doesn’t seem a top priority, does it?
Recently I was at a turning point with my business and had to tame my crazy, wildly messy, haphazard-piles-of-stuff-everywhere-you-looked studio. After months of struggling to keep up with my inventory, I had finally reached the point in my business where I could afford and need to hire an intern to help with production. We’d set up the schedule and my intern’s first day was on a Thursday. I’d been creating and making non-stop for weeks so there were piles of all sorts of things every which way you looked. I walked into my studio the Saturday before my intern was to start and just saying “Whoa!” I mean, really, I’m surely not that sloppy, am I?
Okay, maybe I am. Maybe when I’m intensely inspired I get a little carried away and just toss stuff to the side rather than putting it back where it belongs. Maybe I am really good at playing Jenga with boxes I plan to upcycle for shipping. Maybe my fabric closet was so disorganized and jam packed with fabric I couldn’t close the closet doors.
So I set to work. Here is how I got my clutter under control and gave my studio space a makeover!
SORT & DONATE
I tipped forward five foot tall shelf in my closet and let my fabrics just fall to the floor. Some were crammed so tightly onto the shelf I had to pull out wads of fabric! It was pretty horrific, really. I folded and started each piece of fabric and when finished, I had two whole bags of fabric to donate that I just had to finally admit I was never ever going to be using. It felt amazing to step back and look at my tidy fabric collection! I even broke down all the cardboard boxes in my studio and reduced the (five) stacks to one small corner of boxes beside my shelf of fabric, hidden behind the doors of the closet!
But then I closed the closet doors and was taken aback by how much clutter there still was in my studio, even after putting all the fabric away. My studio is in the tiny third bedroom at the very back of my cozy little home, it’s not very big at all. Not much room for storage solutions. I spent most of the afternoon trying to figure out some storage solutions for the remaining clutter.
TURN UNUSED WALL SPACE INTO CREATIVE STORAGE
Then I had a brilliant idea, one I think maybe other people may like to borrow for their own spaces – take storage UP, all the way to the ceiling. Save floor space and use wall space for clever clutter control! Below I will share how I used previously unused wall space for creative storage solutions in my studio and include some ideas you may like to incorporate in your spaces to free up floor & surface areas!
First up, I used an old over-the-door towel rack thing to hold hangers and hoops in my studio. I can see these being used to hold a variety of things in small studios – skeins of yarn, jewelry, scarves, or maybe even canvas bags to hold smaller supplies, like paint, beads, card stock, printer ink, etc.
Right beside the closet, I have a little nook. To make it a functional space, I brought in my craft show displays – why not use them for their intended purpose, holding products, right? Then I hung my thread rack & art from friends, as well as a shelf/coat rack thing I found in our garage. I stored card stock, my bookkeeping things, sewing machine supply boxes, and more on the shelf near the ceiling and used the hooks to hold a basket I filled with cards and stationery for my business and my headphones and other odds and ends.
I hung more art above my desk, and also a shelf to hold tape, business cards, photo props, a bin for miscellaneous tiny things & some note books and on my table, a basket to catch works-in-progress.
I used the outer ring of a 5″ hoop to hold my washi tape stash and hung it on the wall – no more MIA rolls of washi tape! You could also use this idea for ribbon & twine or bracelets if you are a jewelry maker.
It took two days to get my studio tamed and tidy but when I was finished putting away the final few little bits and I looked around, I was ready to take the greatest step as an entrepreneur with a fresh, clean slate and calm mind and welcome my new intern into my tidy tiny studio. As an added bonus, I’ve discovered with all this wall storage it’s easier to keep my space picked up & keep clutter off surface areas now!
Everything I used for storage in my studio was either thrifted or gifted, or just hanging around the house!
Here are a few other tips for creative studio storage:
- Hang baskets from the wall by their handles for easy access storage.
- Get creative with hanging shelves at various heights on the walls – and get creative with how you store things on the shelf, too! Use vases & small boxes to keep them tidy, or glass jars to hold buttons, pens, paint brushes, polymer clay, etc.
- Stack bookcases for floor to ceiling for the illusion of built in storage and use cute baskets to mask clutter.
- Install colorful cabinet door knobs on your wall to hang things from.
- Hang a series of buckets by the handles – bonus cool points if you spray paint them each a different color and use them for color coordinated storage for supplies like yarn, beads, thread, polymer clay, card stock, or paint.
- Use tiny shelves to store tiny things – figurines, thread, bobbins, little containers of jewelry parts, etc.
Now it’s your turn: try giving your studio/workspace a makeover this week and tell us all about it in the comments or share your ideas for studio organization!


