 Hello OMHG community! I’m Rachel Alison, and I work as a video professional doing branding, launches, trailers, and the like.
Jessika had said that a post with tips for bloggers and entrepreneurs on how to make better online videos might be handy. To be honest, to break it down with any depth at all would require 3-4 posts at least. I thought instead it might be handy to start at the very beginning – getting to know your camera and configuring it for your personal shooting and editing style.
Getting to Know Some Basics About Your Camera
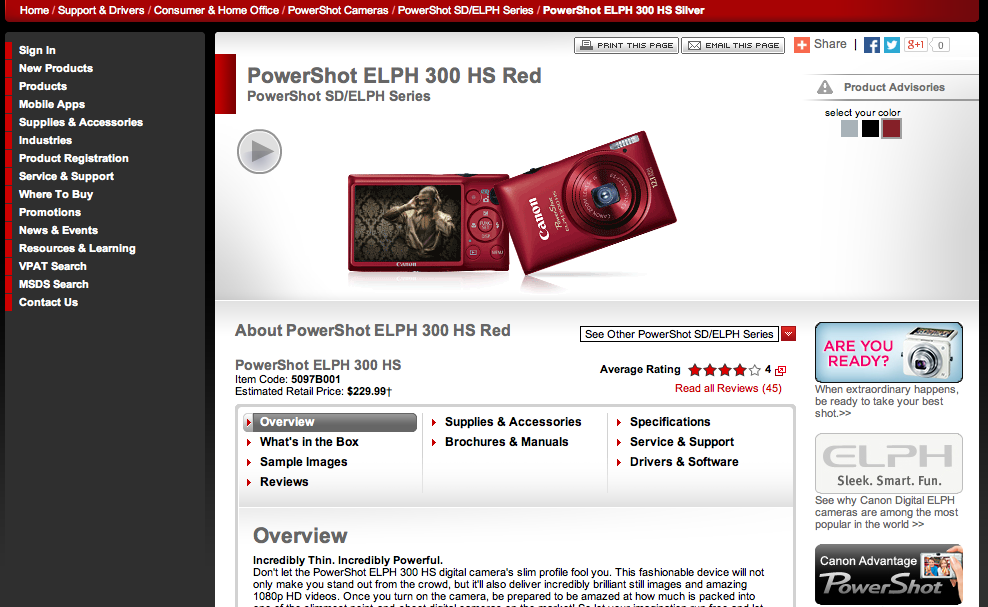
If you’re not very technical, or just haven’t spent a lot of time thinking about it, understanding your video camera might seem daunting. That’s okay though, we’re going to get past that fear! We live in the internet age, where simply Googling the make and model of your camera can bring up instruction manuals, reviews, and even sometimes samples of footage shot on the camera by people who have kindly uploaded to YouTube. For the purposes of this post, my example camera will be a little point and shoot I own that also takes video. It is the Canon PowerShot Elph 300 HS. I got it a few years back, so I am sure there are newer ones on the market that do better, but I figured this would be a good example as it’s a consumer camera around the $100-$150 mark.
Is it high def, or what?
One of the first things you want to know about the video capabilities of your camera is the resolution. Most digital cameras these days shoot high-definition video, but you want to check and make sure. In order to find out, I can look through the instruction manual that came with the camera, but what if I lost it? As I mentioned earlier, Google (or your preferred search engine) is your friend. If I put into Google “Canon PowerShot Elph 300HS instruction manual”, my search yields exactly the result I’m looking for – online text with directions on how to use the camera.
I click on “Specifications” and scroll down until I see a table that tells me what I want to know about the resolution specifications of this camera.
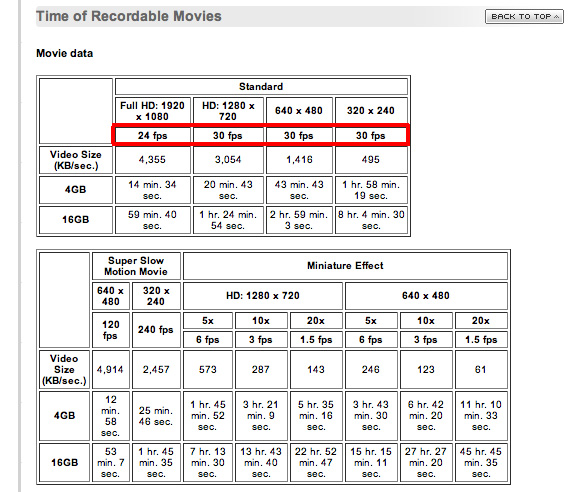
All right, wait a minute. I don’t see the word “resolution” anywhere near this table. How did I know these numbers were the numbers I’m looking for? Without getting too much into it (although you can do some further reading if you like here and here), when you are trying to find the resolution of your camera, you are looking for numbers that will look like #### x ###. Those numbers mean your camera can shoot “A” number of pixels (the first number) by “B” number of pixels (the second number.) We see by looking at the chart above that this particular camera can shoot up to 1920 x 1080, which means 1920 pixels wide and 1080 pixels high. 1920×1080 is often referred to as Full High Definition or FHD. The higher the number, the higher the resolution. (Sometimes, you might also see numbers combined with the letter “p” or “i”, such as 1080p. The “p” and “i” stand for progressive and interlaced. If you see that your camera specs include “1080p”, it means that it shoots HD progressive video.)
Halp, there are more numbers!
In the example instruction manual, we see that there are resolutions that go lower, depending on the shooting mode. What does all that mean? Below the boxes with resolution specs are numbers that look like this: ##fps
FPS stands for “frames per second”. Frames per second is what it sounds like – how many still frames you see in one second of time. The higher amount of frames you get in a second, the higher amount of detail you will perceive. With a higher frame rate, the motion blur will be less blurry and the movements will seem more true to life. We see that this camera shoots Full High Definition, or 1920×1080 at 24 frames per second. If you want a higher frame rate, (for example, 30 fps) you sacrifice in resolution, by stepping down to 1280×720. When I am shooting with this camera, I am almost always shooting at 24fps.
I have two main reasons:
- I want full HD as much as possible.
- 24 fps is the frame rate that most major motion pictures are shot at, and therefore my personal movies will seem less cheap and “homemade”.
Wait, what? Why would a lesser frame rate, 24fps compared to 30fps, look better? The truth is – it doesn’t look better. We have, thanks to the film industry, been conditioned over the years to accept that 24fps is the “norm”. When we see a higher frame rate, we often subconsciously associate it with cheap home movies or soap operas. If you want to understand more about the psychology of frames per second and what effect it has on your viewer, I’ve written about it on my blog. The Cliff’s Notes version is, I only shoot a higher frame rate if I’m going to be shooting something that has lots of fast motion, like cars driving by or animals running. (And to be honest, if I’m shooting something like that, I’m using a better camera than my little Canon Elph.) However, for most blogging-use like video of people talking, shots of buildings, or of products, 24fps is perfectly fine. The viewer is used to the amount of motion blur you get at 24fps, and will accept most video you shoot at that frame rate as being “correct”. But don’t take my word for it. If your video camera shoots multiple frame rates, use the one that seems most visually appealing for you. Just because I always default to full HD at 24fps doesn’t mean that you have to. Shoot some test footage. Using this example camera, you could shoot first at 1920×1080 at 24fps, and then do the same shot at 1280×720 at 30fps. Load the footage onto your computer, and choose what you like best. That should be your default shooting mode.
You will also notice that this particular camera has a slow motion feature where it shoots at a high frame rate.
This is more for funsies, as the slow motion capabilities of this camera are pretty limited. I mean, it can get fairly fast, up to 240fps, but look at that resolution. 320×240 is really tiny. I personally wouldn’t use this camera to shoot any slow motion video for my website because it wouldn’t look very good. (But it can be fun to play with for personal stuff!)
There are other, more expensive cameras out in the world that can shoot higher frame rates at good resolutions. If you are lucky enough to have one, go to town!
Is there anything else I should know before I get started?
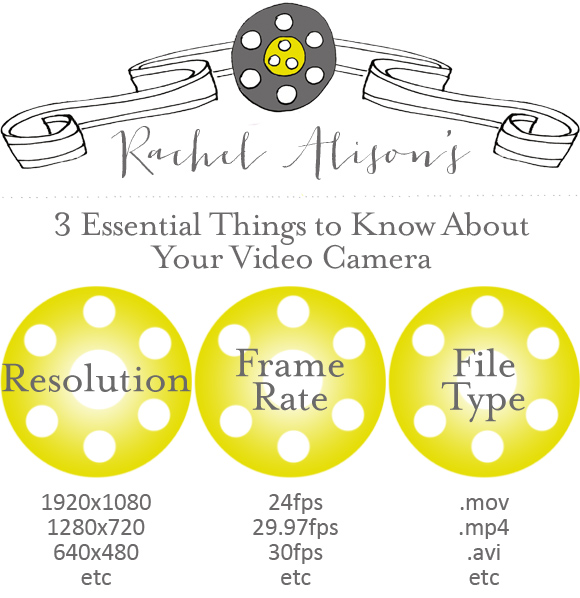
There is always more to know, but one more basic thing you might want to investigate is the type of container format your camera will store the video files as. Many cameras offer you a choice, and you want to choose one that is good for you. It will also come in handy knowing this information once you are at the editing phase. For this camera, I scrolled up on the instructional manual (still on the “Specifications” page), and found the file type.
We see under “Image Storage” that when in video mode, it stores the files as .mov. We also see that we don’t get a choice in the matter with this camera. If your camera offers you choices, see what differences they make. (The instruction manual often will tell you.) Does one file type shoot in a higher resolution? Is one file type incompatible with the type of computer you have, or the editing software you’re using? The answers to these questions often will dictate what file type you will decide to shoot in. But this is just a basic point-and-shoot camera, and all we get is .mov. This is good for our purposes, though, because .mov’s work almost universally with whatever computer and editing software you might be using. Some cameras still shoot in proprietary formats, which then require only using whatever software came with the camera to edit it, or going through lengthy conversion processes. Yuck.
Are we done yet?
There are many things to learn about setting up a camera to fit your needs, and often the more expensive the camera is, the more complex it can be to get it how you want it. This is before the nitty gritty of learning things like white balance, depth of field, lighting, audio, etc. For the sake of this blog post, I’m using a consumer grade point-and-shoot precisely because it’s so simplified. You may not get to do any fancy focus pulls, but you also don’t have to worry so much about set up and shooting with the right settings. The purpose of my post here is to give you the super basics of how to shoot video for your website or blog. Of course there are many other factors to consider, depending on the camera and how in depth you want to get. But for just starting out, knowing the resolution, the frames per second, and file type(s) of your camera is pretty darn good. Also, if you’ve ever tried to shoot video and upload it, you might notice that sometimes it doesn’t work right. Weird lines suddenly appear out of nowhere or Vimeo won’t accept it or (this has happened to me) the entire video is suddenly cobalt blue! At times like these, you might need to sharpen your Google Fu skills and look to the wisdom of the internet to figure out how to remedy the problem(s). Knowing the key things about your camera that we went over today will not only help you shoot better video, but can help with troubleshooting.

Having said all of that (phew!) I believe the most important thing to remember is – don’t be afraid of being “wrong”! Go out and shoot everything. Try different settings. Make glorious mistakes. Make serendipitous errors. The joy of living in the digital age is we no longer have to worry about the expense of shooting “test” film. Load up that SD or Compact Flash card with footage, dump it all on your computer, and do it again! Pretty soon, whether it be shots of your family, your products, or something else entirely, you will have more interesting video to put up on your website.
Have fun!
MEET RACHEL
Video specialist Rachel Alison is based in Los Angeles and helps entrepreneurs tell their stories. She originally began as a professional editor, and has since expanded her offerings to include video branding. You can find her on her website, Twitter, or right here in the OMHG Marketplace. In her free time, Rachel likes wine and Doctor Who.


[…] *getting to know your camera on Oh My Handmade Goodness […]