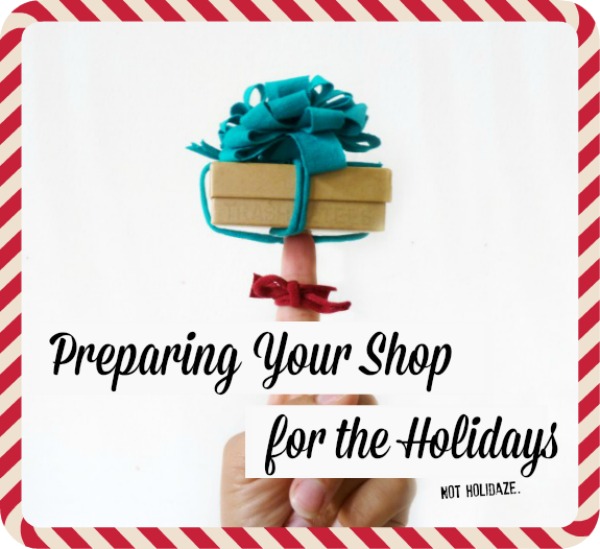
Author: Jenelle Montilone

Preparing Your Shop for the Holidays (Not the holidaze!)

Holidays_Prep

Look at this, it’s already September! Just when the leaves begin falling and I find myself dropping the boys off at school in the crisp morning air- relieved that I can finally sip coffee and talk to myself without interruptions… I’m reminded- Christmas is coming. Cue the Jaws soundtrack.

I’ll be the first to admit my first holiday season as a purveyor of handmade goodness (nearly 5 years ago now) left me a little bit… disheveled. I had stocked up on the things I would need; tees, printer ink, shipping supplies, and the Tylenol. Slowly sales began rolling in. I was excited & humbled knowing that a little piece of my movement was going off to far corners of the world. By the time December rolled around I was fried, toasted, and crispy. The term might be a burnt out daze.

Of the many lessons I’ve learned (and continue to learn) through doing business- these four are worth their weight in gold. Valuable nuggets to remember not only during the holiday season but always.

  1. It’s okay to say no. Taking on custom orders 3 weeks before Christmas, staying up late, stressing about delivery dates- no bueno. Set the tone for your holiday season by having deadlines, honest turn around time frames, and clear shop policies. My first season I took on every order that came my way- the thought of turning away someone or disappointing a customer broke my heart. Sure I earned a few additional sales that way but they cost me valuable time with my family and my sanity. That brings me to this next bit…
  2. Know your limits and accept that your handmade business will only be as big as you can keep up with. You don’t NEED to hire help if you don’t want to. Promise me right now, that you will never be bullied into thinking that bigger is better. If I wanted to be a mega-millionaire then I wouldn’t have started to make one of a kind, totally unique, and completely handmade items in the first place (that’s why I play the lottery)!
  3. Make stuff ahead of time. Ahhhh, yes it seems like a no brainer right? Some days you’ll feel like no one is shopping- take advantage of the downtime to create stock, add new listings, and/or photograph items. This is a double bonus because the more items you have the more chances your shop will get found. Plus, your customer may want to buy multiple items from one seller to save on shipping.
  4. Lastly, make time for yourself and don’t forget to eat lunch. It’s easy to become wrapped up in the hustle and bustle of the holiday season and we often forget to unplug, step outside, and enjoy! As long as you keep offering those awesome products and stellar service, let me be the first to tell you: You are doing a great job! Avoid getting burnt out with a little extra self love celebration.

Are you ready for the holidays? If not, here are 40 more ways to thrive this holiday season on Etsy + a great free Holiday Prep Inventory Planning GuideWhat are your best holiday maker survival tips? Share them in the comments below!

A Postcard from the Pocono Mountains, Pennsylvania

Postcard

It had been nearly 10 years since I dipped my toes into this pristine lake in the Pocono Mountains in Pennsylvania. As a young girl I had spent 1 week each summer with friends and family in a beautiful open A-frame cabin on the lake- days were spent fishing on the lake, jumping off the floating docks, and meandering along the forest forging new paths.

Today I’m sending you a post card from the very same lake, A-frame cabin, and forest floor- revisiting cherished memories, making new ones, and reminding you to meander more often into woods- jump into the waters- or fly.

“Come to the edge, He said.
They said: We are afraid.
Come to the edge, He said.
They came. He pushed them,
And they flew . . .”

— Guillaume Apollinaire
French poet

Camp Craft: Happy Campers Camera Strap Tutorial
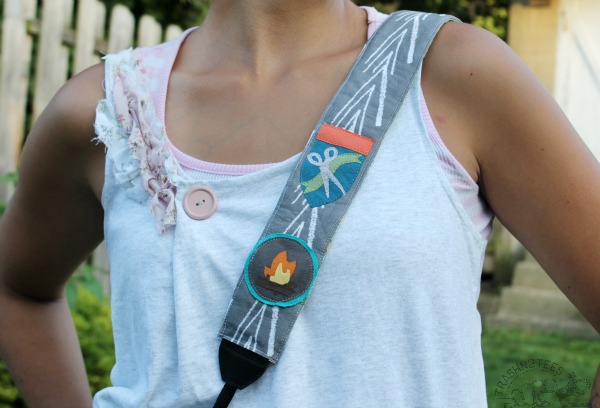
Camp OMHG DIY camera strap tutorial, TrashN2Tees, Oh My Handmade

All summer long we’ve been working towards turning off our electronics, getting back to nature, and earning our merits here at Camp #OMHG. Whether you’ needed the gentle reminder to shine with confidence, cultivate ambition,  or you’re just here for the camp crafts– this experience has brought us back to basics and serves as a reminder to ourselves what community is all about: gathering around the campfire, sharing stories, capturing moments, and embarking on wild adventures.

Camp OMHG DIY camera strap tutorial, TrashN2Tees, Oh My Handmade

Today’s adventure, encompasses all of the above- the tutorial for my Happy Camper Camera Strap encourages you to show off your freshly earned badges with pride (You deserve it!) Badges come in all shapes and sizes, you can find vintage lots, embroider your own, or choose submitted badges and convert them into iron on transfers. (Feel free to forgo the badges and use this pattern to create your own unique camera strap) Suit up for your next excursion, girl scout style.

Camp OMHG DIY camera strap tutorial, TrashN2Tees, Oh My Handmade

To start out, choose 2 fabrics. My fabrics of are designed by Kimberly of Joyful Roots (did you see her Photoshop pattern tutorial yesterday?).  The Retro Pinecone print is one of my all time favorites and is available in several additional colors, I paired it with Agave Weave Charcoal.  You’ll also need to pick up some fusible fleece, to add a little structure and padding- I recommend Pellon Fusible One Sided Fleece.

You’ll need:

Fabric
Fusible Fleece

Scissors (or rotary cutter)

Ruler

Iron

Needle/Thread

 Camp OMHG DIY camera strap tutorial, TrashN2Tees, Oh My Handmade

Cut 1 piece, from the main fabric, that measures 2 1/2″ x 25 1/2″.
Cut 1 piece, from the second fabric, that measures 2 1/2″ x 25 1/2″.
Cut 1 piece, from the fusible fleece, that measures 2 1/2″ x 24 1/4″.  (Tip:  Cut your fusible fleece 1 1/4″ shorter than the fabrics.)

Camp OMHG DIY camera strap tutorial, TrashN2Tees, Oh My Handmade

Fold the ends of the fabric pieces over 1/4 inch and press.  Using a straight stitch sew the short ends.

Camp OMHG DIY camera strap tutorial, TrashN2Tees, Oh My Handmade

Now its time to iron fusible fleece to main fabric. Lay the rough side of the fusible fleece onto the fabric.   Iron the fabric, not the fleece, so you’ll need to flip the entire piece over once it’s centered. (Tip: Remember, you cut your fleece slightly shorter than the other pieces.)

Sewing_Camera_Strap

Attach any badges that need to be sewn.  Tip: I designed my own badges using t-shirt scraps (you’re not surprised are you?) so they were flexible- any thick badges will need to be glued or hand stitched after your finished.

Pin_Tutorial_Camera_Strap

Now, you’re ready to pin and sew.   Place the two pieces of camera straps ‘right’ sides together.  ‘Right’ sides together means that the printed sides of each fabric are facing one another.

Sewing_Tutorial

Using a 1/4″ seam allowance and a straight stitch, stitch down the long edges of the camera strap. Finished it should look like the above image. Don’t forget to snip your crazy threads! Your fabric is now sewn into a tube, open at both of the short ends.
Strap_flip
You need to turn the fabric so the pretty sides are on the outside. This is the hardest part of the whole project. I promise! Here are some tips for turning the tube right side out.
Sewing_JoyfulRoots_Fabric

Once your strap is turned right side out, press it flat. I prefer a more finished look so I added a straight stitch down the length of the strap on both sides.  Your finished product will slip over your current camera strap and can be removed for adding more badges or to switch up your camera strap whenever Kim designs more must-have fabrics. (I’ll let you in on a little secret- Kim and I are working on a fantastic collaboration right now and you’ll want to check the fabrics we’re debuting in September!)

Camp OMHG DIY camera strap tutorial, TrashN2Tees, Oh My Handmade

I hope you’ll make you’re very own Happy Camper Camera Strap, this is absolutely the perfect project to take on if you’re short on time (it takes 15-30 minutes total!), short on fabric (it requires less than a 1/4 yard total!) or still a little bit intimidated by your sewing machine. (read: it can totally be done by hand too!) Essentially the project only requires 6-8 straight line stitches- why no try it out & earn yourself the Sew Something Badge.

Join me in the comments below, I’d love to gather round and share our favorite take aways from Camp #OMHG so far. I’m curious to find out what badges you’ve earned and if/how you’re wearing them proudly.