Author: Sam Osborne

Designing a collection – how to stay sane and organised

Designing A Collection: How to Stay Sane & Organized, Sam Osborne for Oh My! Handmade
When you’re creating a new range or collection there are lots of elements that need to come together and it’s easy to lose control of one or more of them if you don’t stay organised and focused. Here are a few organisational tips I learned during the creation of my latest Wondercook collection.
.

Getting started:

The start is, in some ways, the hardest part of any project. It’s easy to procrastinate and go round in circles. Most creatives aren’t great with the ‘you can do anything, anytime’ approach so it’s good to put a framework around the project to give you some focus and help get you started.
.
  • Write a brief. It doesn’t have to be too specific, maybe no more than a general theme (for my new range it was simply food and cooking). It should be something that interests you and that you think you can continue to be interested in for a while – you’ll be living with it for a long time! Don’t forget to also think about your audience, what kind of people are they? What do they like?
  • What’s the timeframe? Setting a goal for when you’d like to be finished is important. I hung up a big wall planner and stuck a pin in the date I wanted to go live with everything. Seeing it there everyday helped get me moving, it’s amazing how quickly the days start to disappear!
  • Do you have everything you need? Is your workplace tidy and inviting? Do you need to do any research? It’s easy to decide that you can’t make a start today because your desk is a mess or your computer files need reordering. Do it now and get yourself all set up.

Keep the designs moving:

Staying on track when you’re in the design phase can be quite hard. It’s super easy to get lost in the fun of designing, which is awesome, but it can lead to delays in actually getting the work done.
  • Find a workflow that works for you to keeps things moving. I allow myself a set period of time at the start of a project to go crazy, have fun and explore the theme without the pressure of thinking about the end product. Then when it comes to playing out the design for specific products I’ve got loads of icons, motifs and designs to play with – this stops the blank canvas anxiety and saves me lots of time!
  • Keep an eye on the timescale you’re working towards and set yourself deadlines. When I started this collection I wrote a big project plan that included all the phases of creating the range, from initial visuals, through the design phase and manufacturing time. From that plan I then set myself weekly goals so I knew what I was aiming for and could focus on that.
  • Get help, it’s really useful to have someone that you can tell about your goals and deadlines who will check in with you to see how you’ve done that week. OMHG Community members got together recently as accountability partners and this helped hugely during the design phase of this range (thank you Joy!).

Managing manufacture and money:

There is lots more to a collection than the design and creation side. You’ll need to spend a lot of time organising suppliers and/or manufacturers and ensuring that your costs, margins and prices are right so that you can be sure of making some money.

  • Shop around. Whether you make your products yourself by hand or work with manufacturers it’s always good to shop around to find the best people, products and price. I keep a big list in my google docs account of suppliers and price up every possible option before deciding who and what to go with. Don’t forget to send for samples – seeing the items for yourself before buying makes a huge difference, keep notes about the samples with your suppliers info so it’s all in one place for the future.
  • Spreadsheets are your friend (honestly). The amount of costs you need to take into account can feel overwhelming, especially if your brain isn’t wired for numbers. I’m not a natural spreadsheet person, in fact I usually run a mile from them, but it’s hard to see where your costs are going without them. So I dug deep and built a spreadsheet where I can enter unit costs from suppliers or manufacturers at one end, add percentages for design and admin and it works out my overall costs, wholesale prices and retail prices. Find more info on working out your product costs here.

The last mile:

.This can be the worst bit of any project, you think you’ve sorted everything then you realise there are key things you haven’t even thought about or the amount of little tasks left to sort out starts to feel overwhelming.

  • Get yourself a nice new notebook and write The Big List. You’ll feel much better once it’s all down on paper and then you can start ticking items off. I also have a big board on the wall of my studio that I use to keep track of everything, seeing it up on the wall helps make sure nothing is missed and I love the feeling of wiping each one off as I’ve done them!
  • Set a deadline for when it will go live. Not telling the world a ‘go live’ date can be appealing, especially when you’re not sure that you’ll ever make it through the items on your list, but honestly this really helps. Name a date, tell people about it and you’ll have no choice but to stick to it!
  • Reorganise your time. The old adage that 20% of the work takes 80% of the time is true, this last bit will take way longer than you think so try and clear your decks if you can. Reschedule other work, fill the freezer with easy cook meals (or put the takeaway on speed dial), arrange extra childcare or decide that the hoovering can wait.

My Wondercook collection is available now from www.sam-osborne.co.uk/shop

So just a few simple bits of organisation can really help keep a big project like this on track. How do you organise your projects? Do you have any top tips to share?

Branding DIY: An Insider’s Guide

Branding DIY: An Insider's Guide, Designing for Non-Designers, Sam Osborne

I’ve been a graphic designer for over 10 years and in that time I’ve worked with and created many brands. Along the way I’ve learned a few pretty important things that help get the best results from all branding projects. The best thing is that these rules apply as much to your own brand as they do to huge multinationals and with just a little bit of work at the beginning of a project you can make sure your brand really reflects all that is unique and brilliant about your business.

Branding DIY: An Insider's Guide, Designing for Non-Designers, Sam Osborne

Don’t start with design.

If you go in first off with pencil or pixel you’ll probably come undone in the long run. It’s wise to start with some serious thinking about your business, what it is (and isn’t), what messages you want to communicate and who you are communicating to. I usually run through a simple set of questions when I start a branding project with new clients.

Describe what you do/your company does as if talking to a 10 year old

Describing the essence of your business in a clear, simple statement can be tough, but knowing this is a powerful thing. Think about how and why you do it as well as what you do. The shorter and more concise this can be the better and don’t use jargon or technical terms – keep it real!

Who is your target market? 

Be as descriptive as possible, try and delve deeper than age and sex – Where else do they shop? What newspaper do they read? What are their values and priorities? What problem of theirs are you solving? These are the people who will be buying your product or service and so your brand needs to appeal directly to them. Having a clear understanding of who your audience are really helps focus your mind, it’s not all about what you like, keep your customer in mind at every stage of the branding process. Look at the design of other brands that are aimed at the same people and start a scrapbook or Pinterest board of these visual goodies

Who are your competitors?

Your industry competitors are probably aiming for the same group of people as you but, by looking at their branding, you’ll quickly see that there is more than one way to go about this. Can you spot your competitors who are positioning themselves as a premium product? How about ones that have a more value based message? How does their design differ? Note also the tone of voice and the specific language they use to describe themselves and their product or service. Add this to your visual scrapbook or moodboard.

How are you different from your competitors? What are your unique selling points (USPs)? Why would customers shop with you rather than your competitors?

This is a really key thing to know, what exactly makes you different from all of those competitors? Are you positioned differently, ie more up market? Are you more hands-on and human? Is your service level higher? How? Or do you have a specific selling point like using all recycled materials? This a really important message that your brand will need to get across.

What is the overall impression you want people to have of your business?

Is your company energetic and friendly or calm and authoritative. Try and find words that really describe the uniqueness of your business and avoid ‘catch-all’ adjectives like quality, professional and trustworthy (no one describes their business as not being these!) Think about your customer’s experience of you and your company, what would you like them to say about you to their friends? What words would you like to see in testimonials from happy customers? Think about your USPs when writing this.

Using your answers to all the questions above as a starting point chose five or six key words that best describe your business.

Try to find words that are rich in descriptive qualities and spark the imagination. The best words are ones that could only apply to your business. These words are your guides. Know them, love them, print them out and pin them on your wall.

For instance here are mine: Colourful, Curious, Authentic, Unexpected, Nerdy, Bold

Branding DIY: An Insider's Guide, Designing for Non-Designers, Sam Osborne

Look in unusual places.

If you’ve been collecting designs from other brands aimed at your audience and those of your competitors it’s likely that you’ll they have some common design threads. So now it’s time to go and look in some more unusual places for inspiration outside this narrow band. Start with your keywords. What springs to mind when you think of them? Do they lend themselves to particular colours or fonts or maybe there is an obvious icon or motif that goes with one of the words? How do you draw witty, or curious, or futuristic, or intellectual (or whatever your words are).

Go and do your research, ask friends and family and be open to inspiration everywhere from TV adverts to walks in the woods. This is how you find your unique visual identity – it lives in your key words and the trick is converting them into a visual shorthand.

Branding DIY: An Insider's Guide, Designing for Non-Designers, Sam Ossie

Not just designing a logo.

The logo is just part of your brand, a big part sure but it doesn’t end there. Everything you are involved with is an extension of your brand, from your URL, to your tone of voice and even the way you answer the phone. It’s important for every element of your business to be consistent and the best way to do this is to refer back to your keywords. Think about how they affect your telephone manner, the way you sign off you emails or the paper stock you choose for your letterheads? How would you do this in an unexpected way? An optimistic way? A community-minded way? (insert your own keywords here…)

You get to build a whole world around your brand and this is the most fun part of any project – the sky is the limit, run with your imagination and challenge the ‘normal’ way of doing things.

If you are not sure whether you can DIY your own brand (or anything else) here is some printable inspiration to remind you that “YES YOU CAN”, just click here or the image below to download your copy!

Yes You Can inspirational print by Sam Osborne

History Explorer Badges: Adventures Through Time

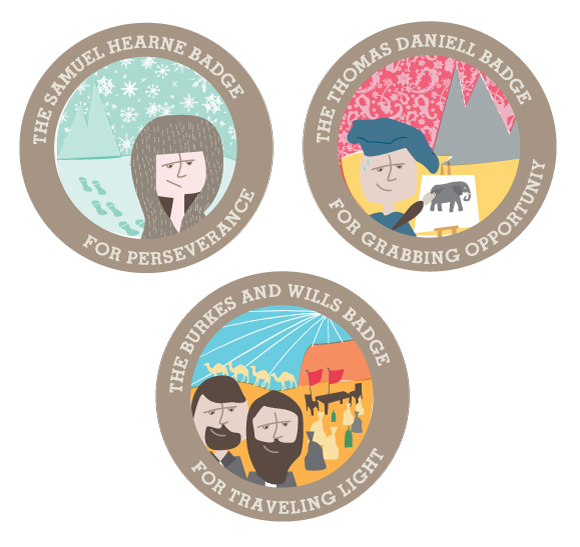
History Explorer badges, designed by Sam Osborne, Oh My! Handmade

Click here or above to download your Sam Osborne history explorer badges

As part of the research for my next collection I’ve been reading a lot of stories of adventures, explorers and triumph in the face of adversity. As I was reading these stories it became clear to me that a lot of the lessons these brave people learned were actually pretty applicable to my life as a creative business owner. Anyone who has taken the leap to create their own business, whether it is big or small faces daunting landscapes, embarks on crazy adventures and needs to summon all reserves of bravery. So what can these famous, and not so famous, explorers who changed the shape of the world as we know it teach little old us!

History Explorer badges, designed by Sam Osborne, Oh My! Handmade

Try, Try & Try Again

1769 Samuel Hearne was commissioned by the Hudson’s Bay Company to walk due North from Prince of Wales Fort in Canada to the shores of the Arctic Ocean, a round trip of more than 3500 miles to places where no European had ever travelled. He left the Fort on 6 November 1769 with four travelling companions and headed out in the icy wilderness, after just three weeks they were ambushed and had their food and guns stolen. They just about survived the trip back. Two months later he set out again, only to have the same thing happen, except this time he had his tent and coat stolen as well. Close to starvation, he was rescued by a tribe of Chippewa Indians who helped him back to the Fort. But even this didn’t put him off, a mere 12 days later he set out again – third time lucky – and he did eventually find the Arctic Coast and helped to start mapping the North West Passage. So what can we learn from Samuel Hearne? Try, try and try again – he wasn’t put off, even in the face of death and even when given the chance to take the easy route he returned to his quest. He was determined to see his adventure through and didn’t let a few bumps in the road put him off.

History Explorer badges, designed by Sam Osborne, Oh My! Handmade

Grabbing Opportunity

In 1785 Thomas Daniell was a landscape artist in Surrey, England, he was good at what he did but was hard-up and out of work. He saw an opportunity in the new desire for paintings of life in India so took a massive gamble and travelled the 6,500 miles to Calcutta. He his nephew and apprentice William, who travelled with him, were industrious and determined and during their nine years in India they travelled the length and breadth of the country, they sailed up the Ganges, they travelled on elephants with the British Army and journeyed into the the Northern mountains. Everywhere they went they got out their folding tables and easels and made astonishing paintings that they sent back to England. By the time they themselves returned there in 1794 they had amassed a fortune of £43,000. So what do Thomas and William teach us? Thomas was a smart chap – saw an opportunity, a gap in the market and put himself on the line to take advantage of it. He couldn’t have known that it was going to pan out so well, when he left England he was taking a huge risk, relying on his gut instinct, his skill and his ability to capture what people wanted. An opportunity was presented to him and he grabbed it with both hands and rung everything he could out of it, in turn changing his life forever!

History Explorer badges, designed by Sam Osborne, Oh My! Handmade

Staying Flexible & Unburdened

In 1860 Burke and Wills set out from Melbourne in Australia to chart the 2,000 mile route to the Northern coast of Australia, at that time the desert heart of Australia was uncharted and unknown to European settlers. They set out from the Royal Park in Melbourne on August 20th 1860 to a huge fanfare, the expedition was huge the 19 men took with them, 23 horses, 6 wagons and 26 camels, these were weighed down by enough food to last two years, a cedar-topped oak camp table with two chairs, rockets, flags and a Chinese gong – the equipment weighed as much as 20 tonnes! One wagon broke down before they had even left the park, two more broke down less than 5 miles later. They struggled so much along the route that they periodically had to leave things behind – sugar, lime juice, guns and ammunition, still it took them over two months to travel just 470 miles – a distance the mail coaches managed in just a week. Burke and Wills did eventually make it to the North shore but lack of food and monsoon rains ravaged the expedition’s return journey and only one man, John King made it back alive. Burke and Wills are Australian heroes, it took huge bravery to even attempt to cross the outback then and their expedition paved the way for many more but you can’t help wondering if they had travelled a little lighter maybe they would have made it back alive? So what do this intrepid pair teach us? Don’t get bogged down with things your business doesn’t need. You can start a business with almost no money and very little equipment so maybe burdening your your young enterprise with bank loans and credit isn’t a smart idea. Think carefully about everything you take on and try to stay nimble and flexible – that’s the best thing you have over the big guys after all!

History is full of stories like these, people who took a chance, grabbed an opportunity and did what everyone else said was impossible! Just because your personal adventure might be close to home and involve less foreign travel and risk to life and limb, doesn’t mean you shouldn’t approach it in the same way. Award yourself one of the badges if any of the stories above resonate with you.

Do you know any other adventure stories, historical or modern, that have something to teach us or have inspired you?

Big-Tree-Pattern-thumb

MEET SAM OSBORNE

‘Brightly-coloured designer nerd’ Sam Osborne is a fan of all things bright and colourful! She splits her time between running her own successful homewares and accessories label, licensing her unique prints & patterns and creating smart branding and design for fellow small business owners.

WEBSITE || FACEBOOK || TWITTER